Home › Forums › Wallbox2mp3 installation › SCH1 – Coin switches do nothing
- This topic has 25 replies, 3 voices, and was last updated 4 years, 9 months ago by
Scudie.
-
AuthorPosts
-
-
1 May 2020 at 3 h 13 min #47162
M_schrenk
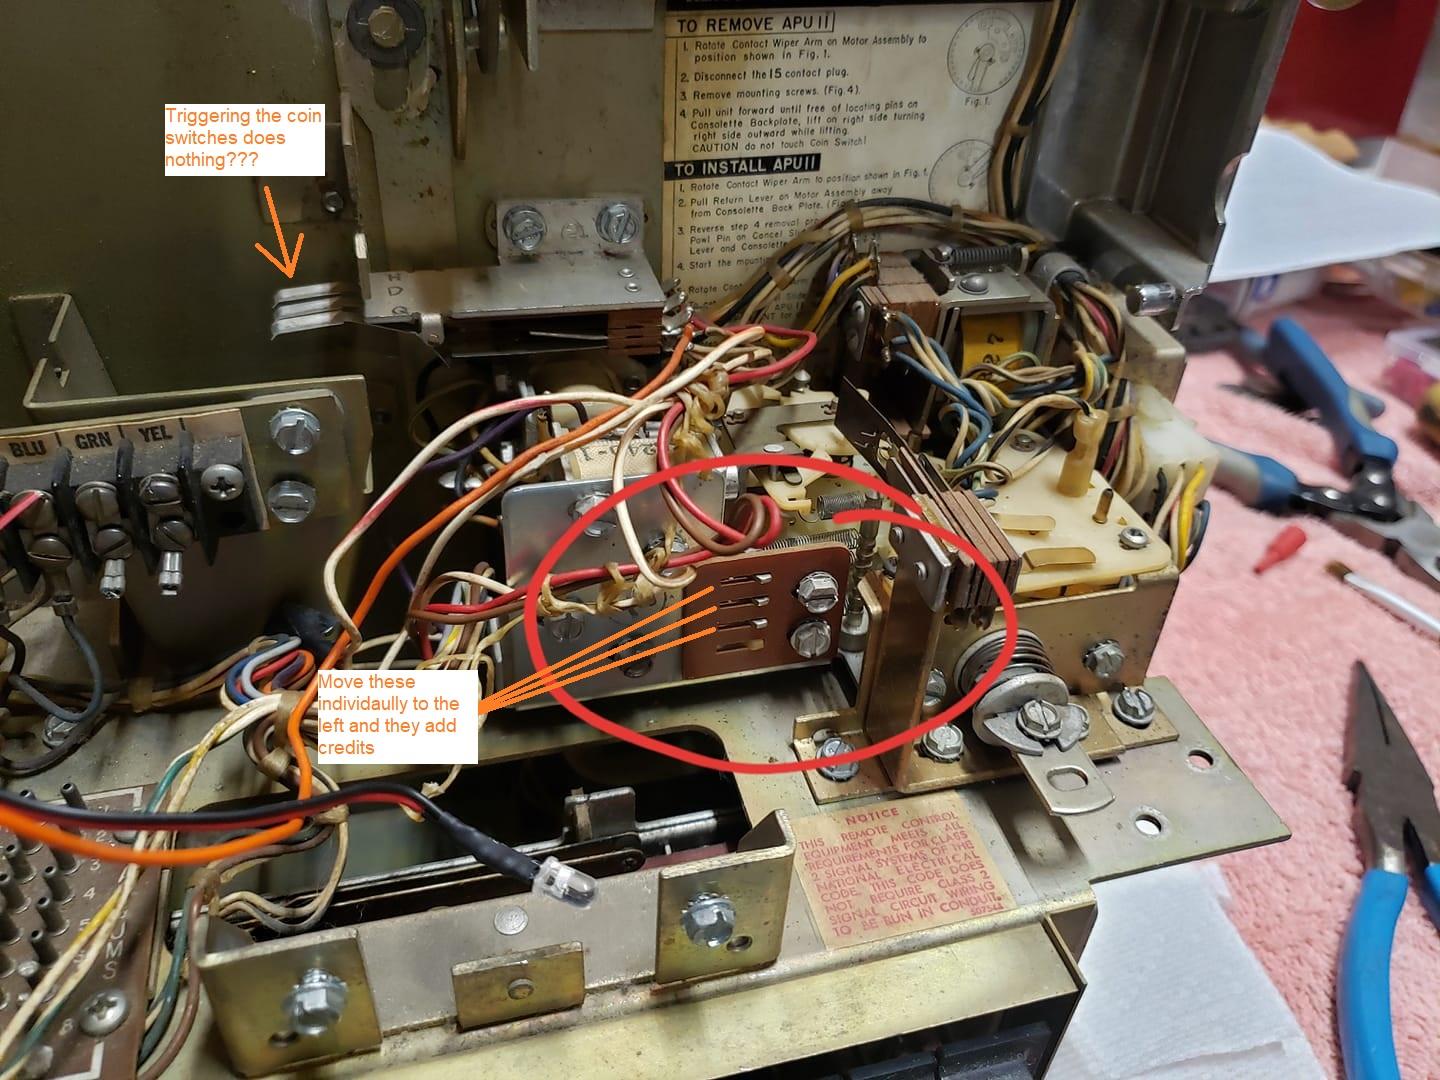
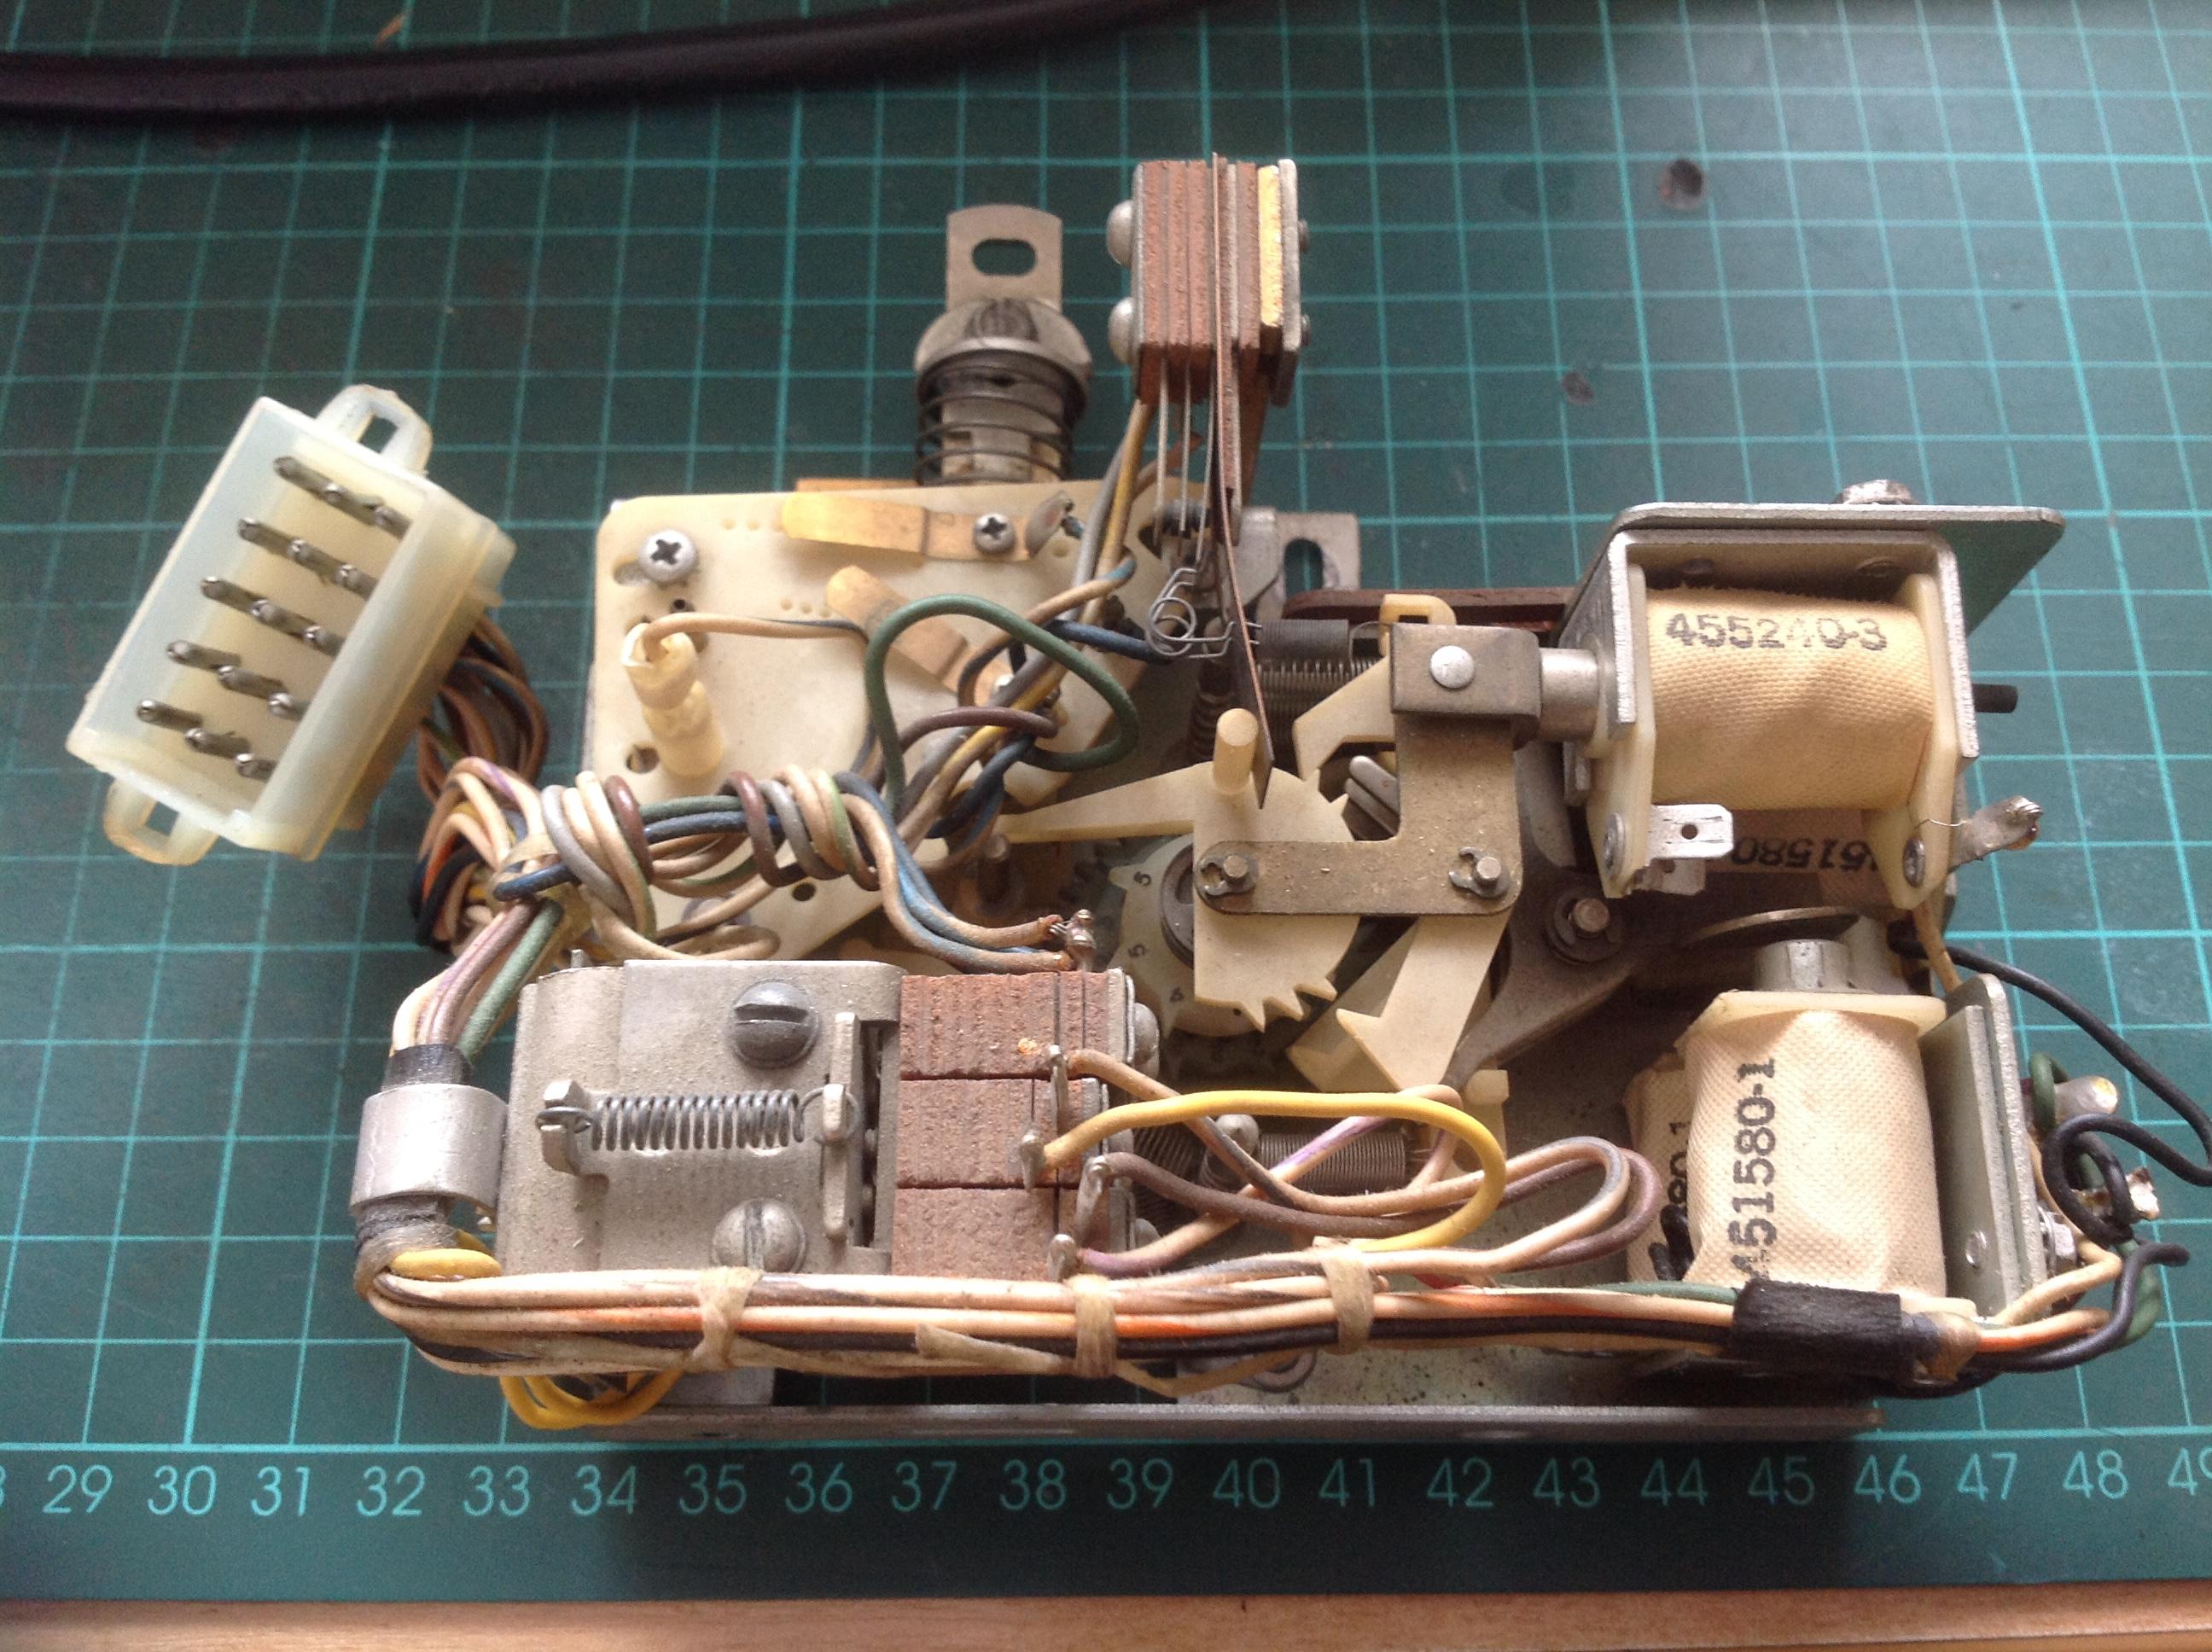
ParticipantI had some time to work on my SCH1 today. The way I bought it the wallbox had two wires had been cut for some reason. The Red/White wire from the DIME coin switch to the DIME solenoid on the APU as well as the Orange/White wire for the QUARTER switch and solenoid had been cut. I have them both temporarily repaired (twisted). Powered it up and all three of the coin switches do nothing. Any idea what could be causing that?
The only way I can get a credit is to push one of the 3 little pins to the left that are shown in the photo. They are each tied to the linkage from one of the solenoids on the APU.
-
1 May 2020 at 10 h 39 min #47163
Scudie
ParticipantHello M Shrenk
I would think that the reason that the wires were cut was at some point the quarter coin switch has been connected to the dime wire so achieving just one credit for a quarter.
Any how the reason nothing happens when you activate a coin switch is that there is no power to any of the coin switch terminals, these are the 3 terminals on the separate connector block just to the left of the main terminal strip, they would have been originally supplied by the jukebox.
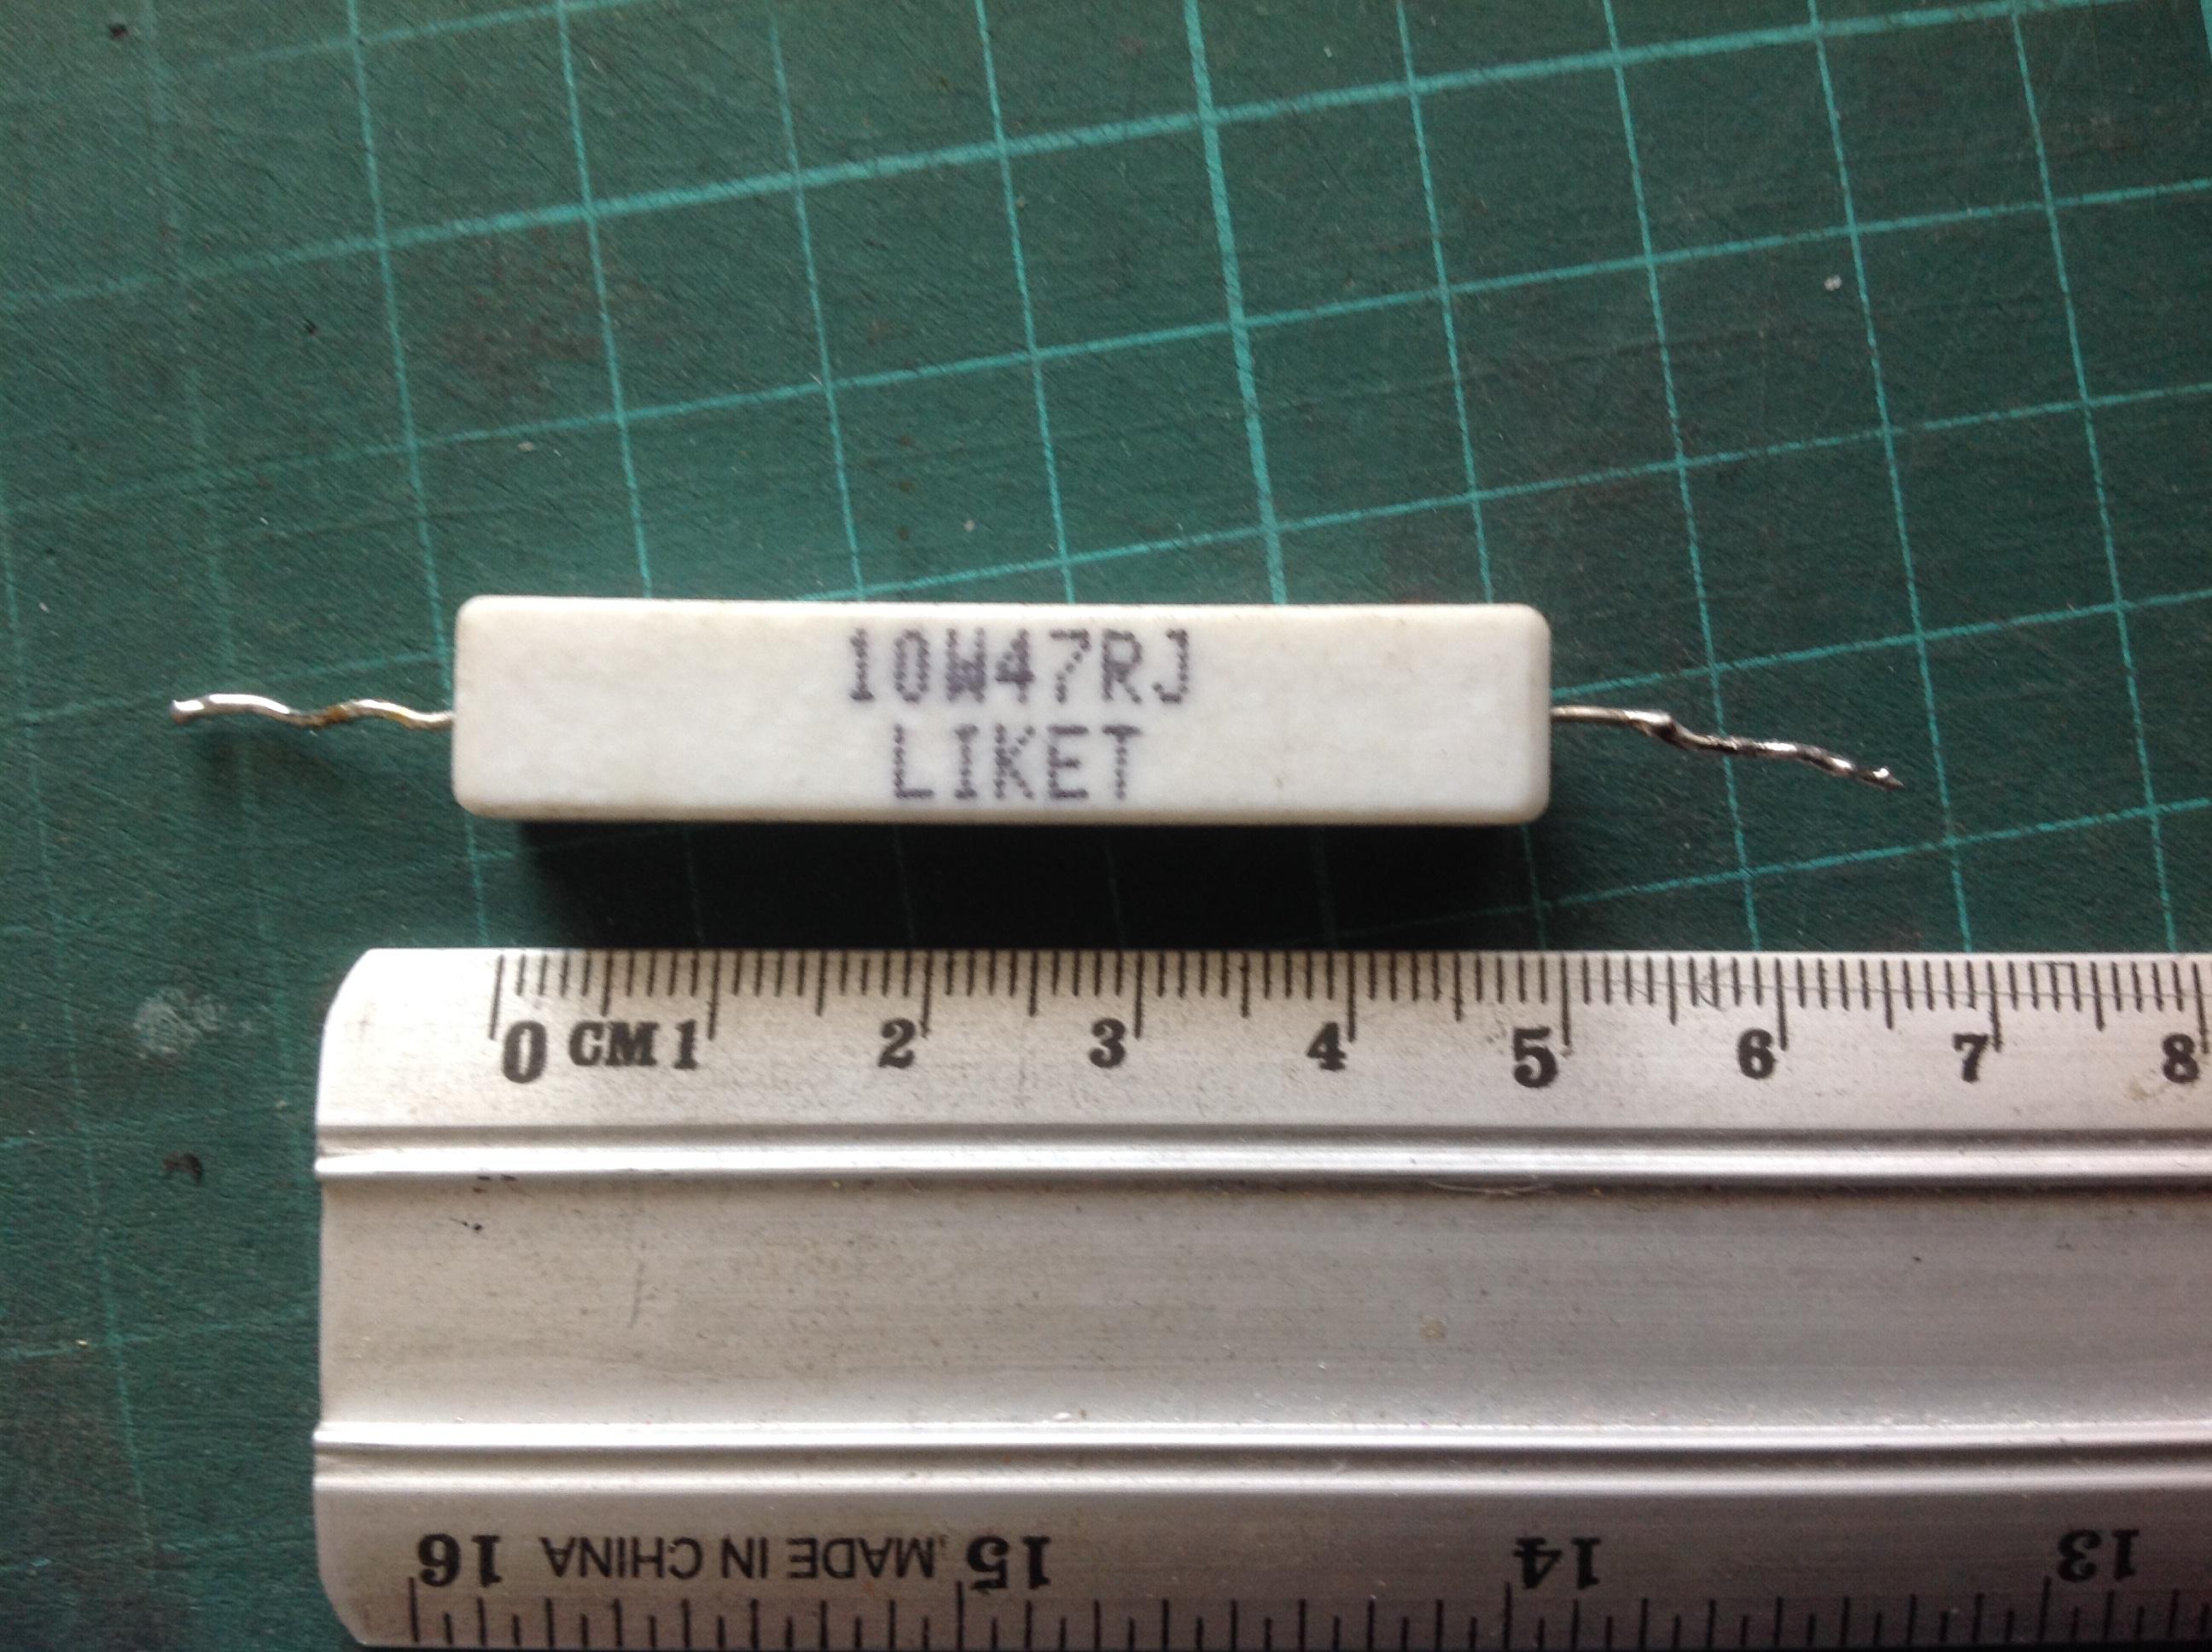
What you have to do is connect all 3 wires brown, red, and orange together on one common terminal (top screw) then using a 40-50 Ohm 10 Watt power Resistor connect the associated lower screw to the 25vac White terminal on the main connection strip.
The resistor will be quite a large ceramic item approximately 50mm long & 10mm thick.
Cheers Scudie
-
1 May 2020 at 13 h 08 min #47165
M_schrenk
ParticipantScudie – You are the master of all wallbox knowledge!
It’s funny that you provided that solution as I kept looking at the electrical schematic last night while in bed and saying “there is no circuit….” It shows a switch and then goes to that block you mentioned, but there is no circuit. I actually was going to try to hook one of the solid color wires to the 24VAC terminal this morning but without the resistor you mentioned. Good thing you replied and I truly appreciate your help and willingness to share your knowledge. Now I will go to Amazon or eBay for the “mother of all resistors”.
I think you may be correct about the quarter idea. When I got the machine the solid Orange from the quarter switch was also cut. It along with one of the Dime wires had stripped ends. They were not twisted together but, just as you said, could have been to force one credit for a quarter – As time went on costs go up and the store owner increased price for a song! The other clue that makes your idea even more possible is the slug rejector or was set to reject everything except quarters.
Very good work Agent Scudie! You are promoted to Captain Scudie for you crime solving ability (when it comes to mods done to a wallbox)! Seriously…. I’m pretty sure you nailed it!
-
This reply was modified 4 years, 11 months ago by
M_schrenk. Reason: Grammar
-
This reply was modified 4 years, 11 months ago by
-
1 May 2020 at 17 h 51 min #47170
Scudie
ParticipantHi M Shrenk
I am sure that it will sort out your problem, you could just make the unit freeplay.
The resistor you need will look something like this
Glad that I was able to help with the SCH . I don’t suppose you have a wiring diagram for the SCH do you? I Have got one for the SC1-4 but the H is different.
Cheers Scudie
-
1 May 2020 at 21 h 24 min #47171
M_schrenk
ParticipantScudie,
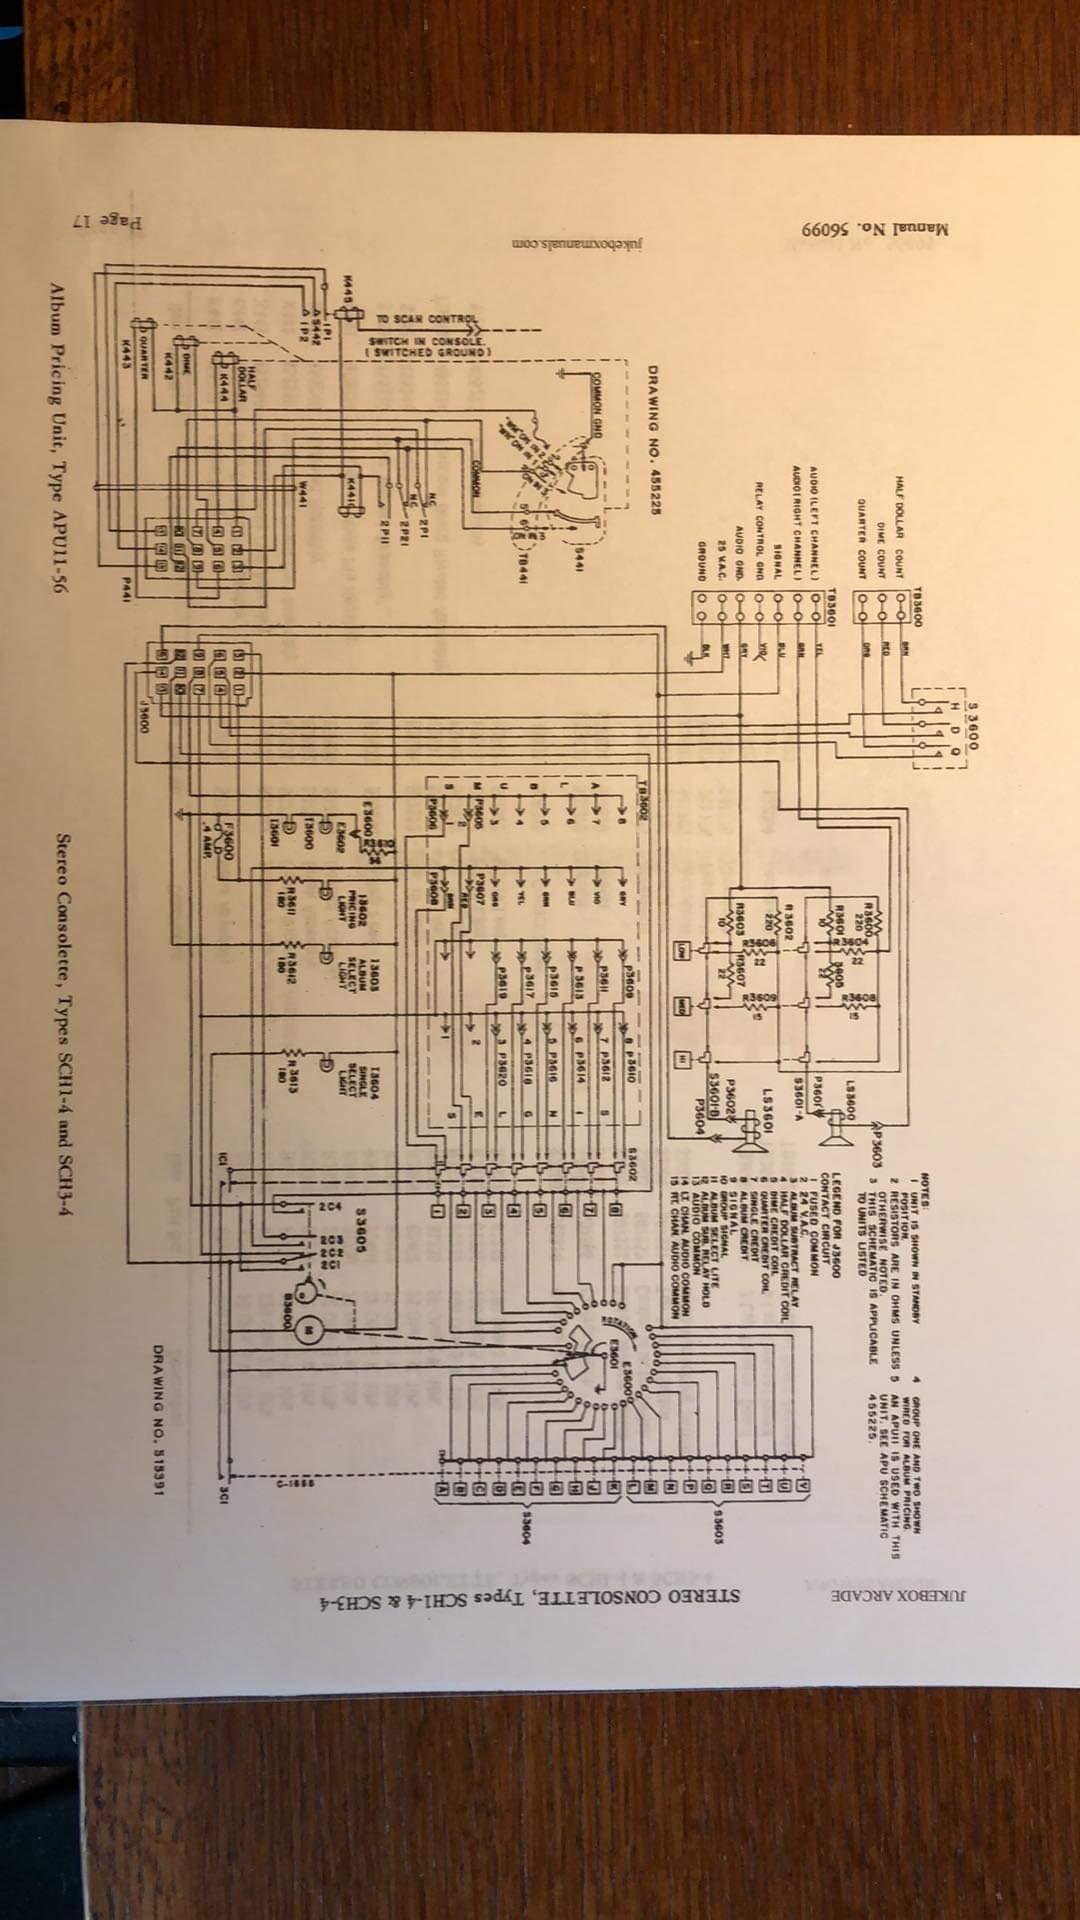
A Facebook group member sent me the SCH1 wiring diagram… Very helpful.
I did what you recommended
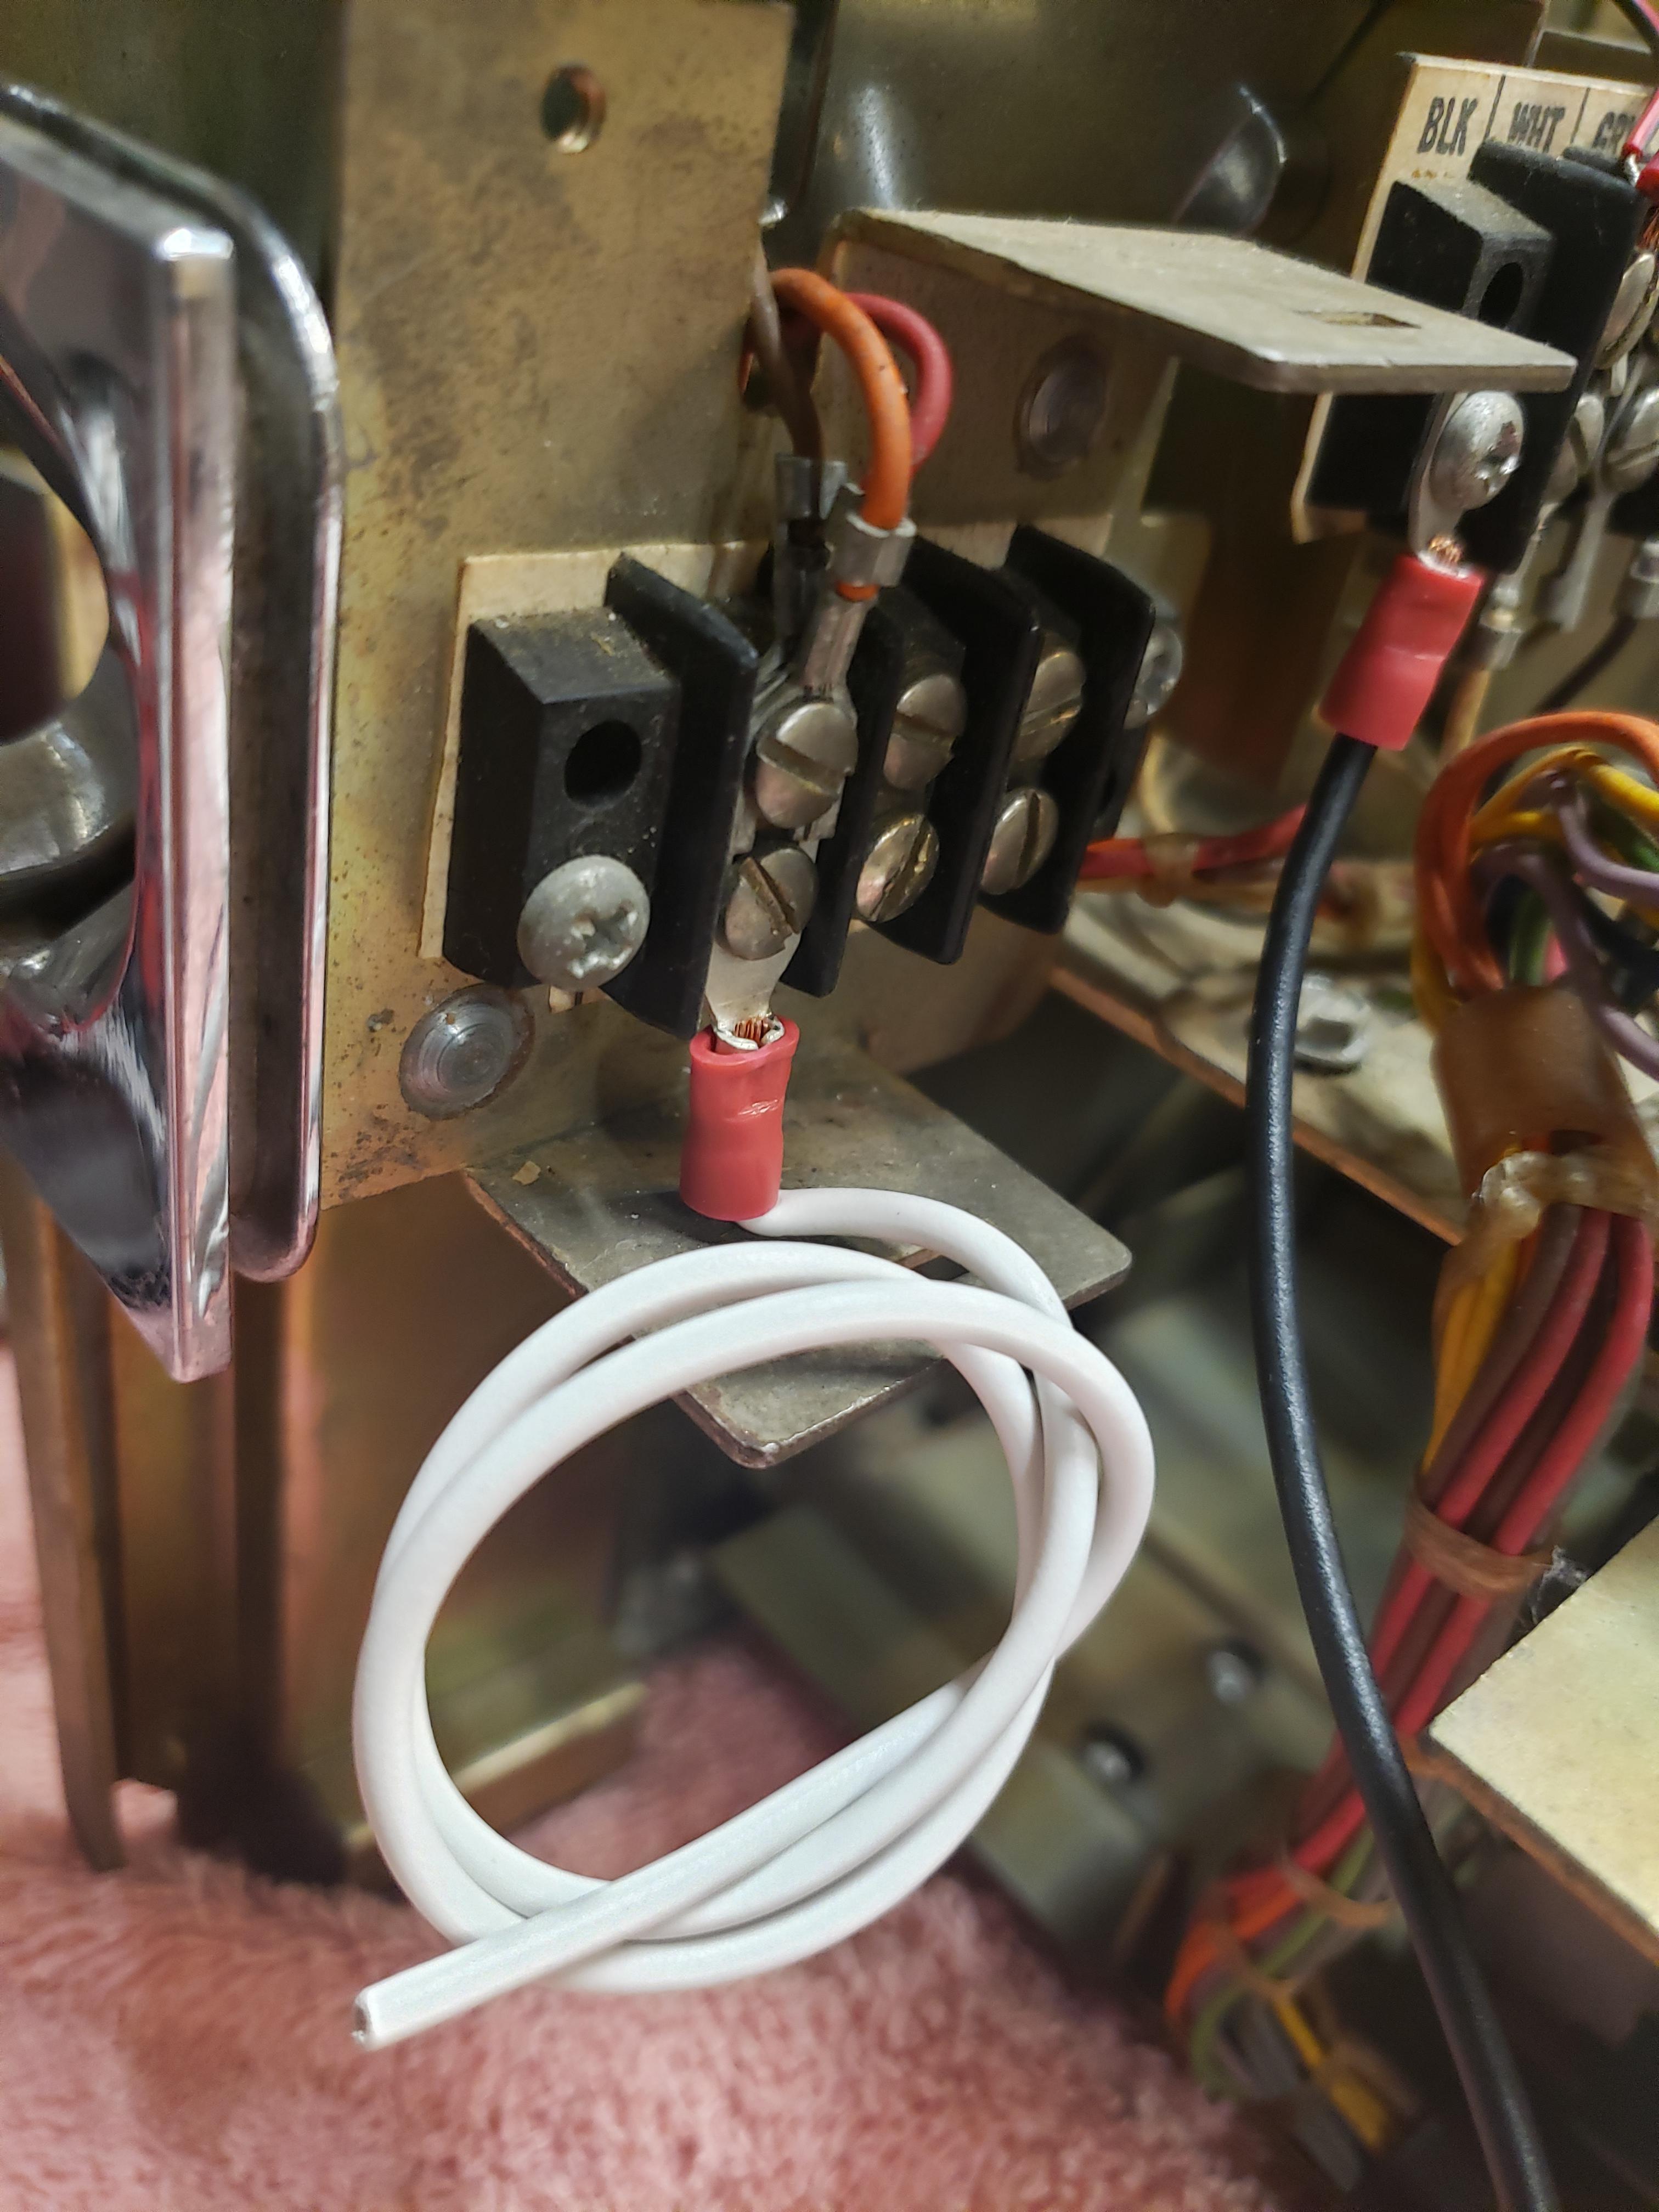 and have all 3 wires going to one terminal. When the resistor arrives I’ll wire that to the coiled white wire and then on to the 24VAC terminal on the main block.
I ordered 2 resistors, one from Amazon and one from Ebay. The race is on!
-
1 May 2020 at 21 h 28 min #47172
M_schrenk
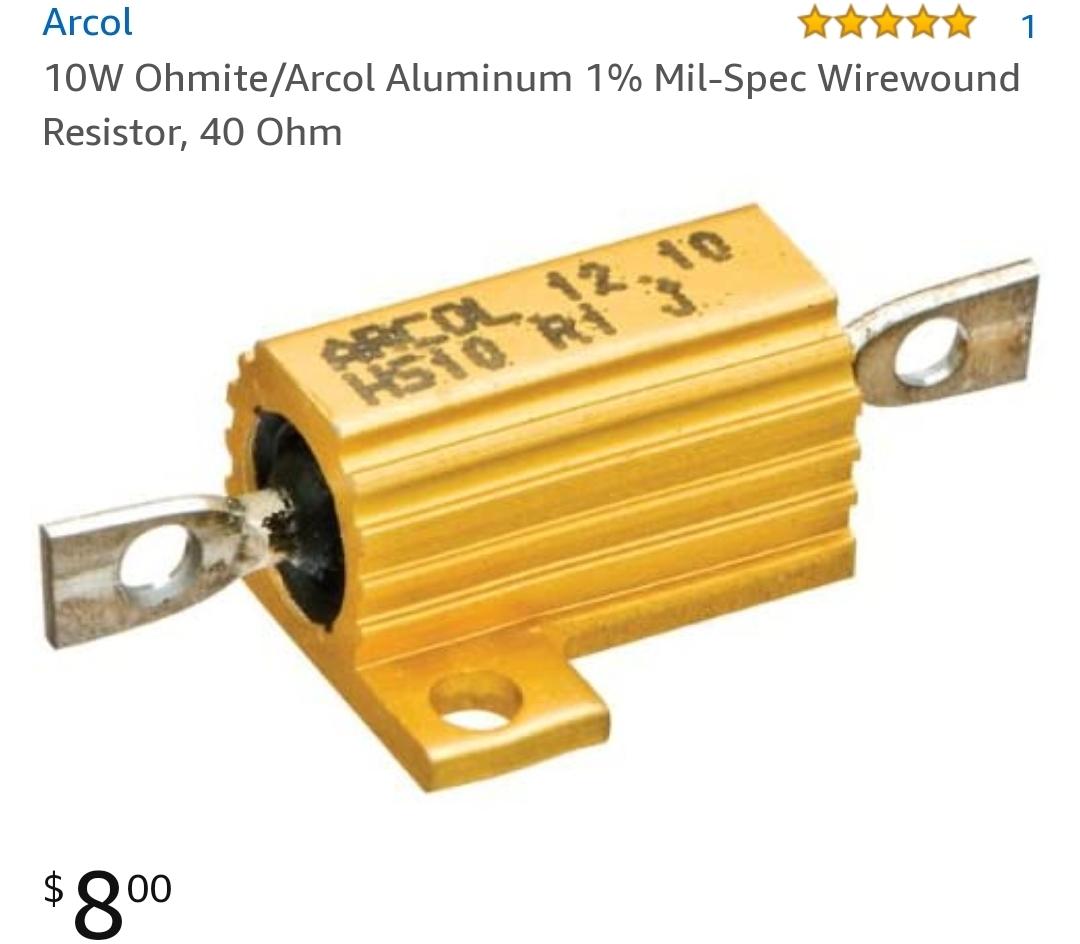
ParticipantHere are the two resistors I ordered. Whichever I don’t use I’ll keep if/when I get another SC wallbox.
-
1 May 2020 at 21 h 29 min #47173
M_schrenk
Participant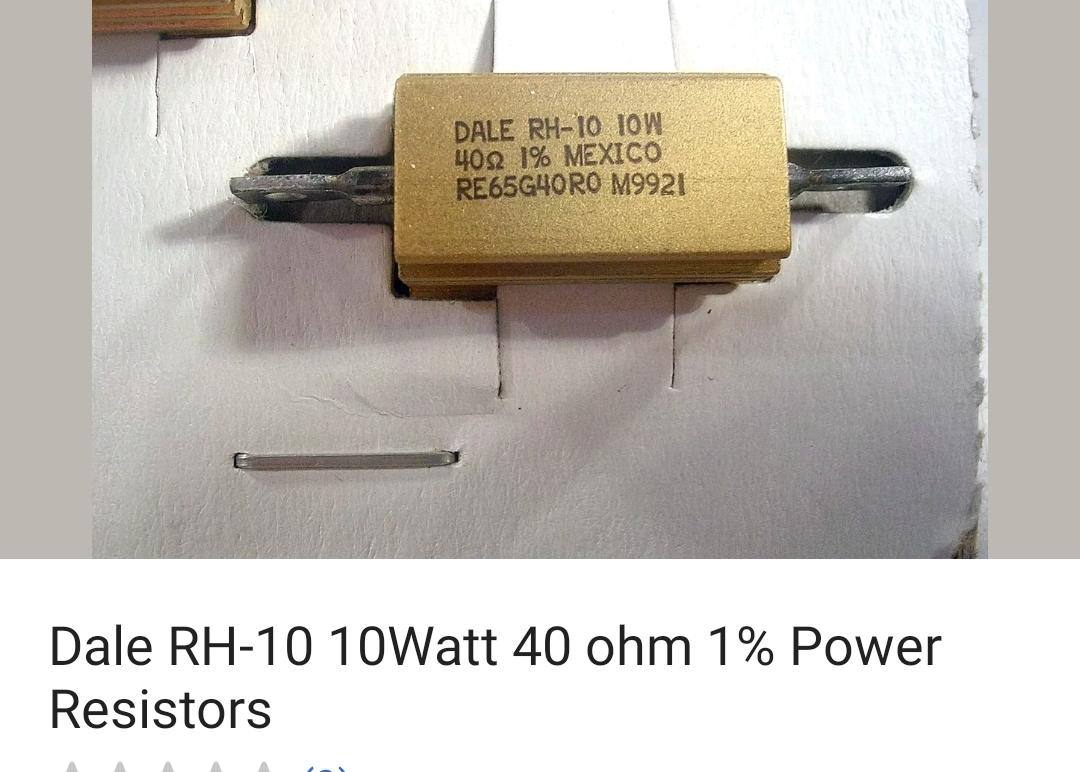
-
2 May 2020 at 11 h 08 min #47174
Scudie
ParticipantGood morning M_shrenk
Is the SCH wiring diagram paper or a PDF file of one ?
If you have it in PDF would you mind sharing it with others on the forum?
As far as I am aware there isn’t a copy of that particular diagram in the Support section on this site, several of the Manuals to be found there were donated to the site by its users.
By the look of it the resistors you have ordered they look to be quite a bit shorter in length, maybe half as long as the one I used.
Cheers Scudie
-
3 May 2020 at 13 h 55 min #47183
M_schrenk
ParticipantThe electrical diagram was sent to me as a photo from another Facebook group member. As expected there are quite a few differences between the SCH and SC wiring diagrams.
-
3 May 2020 at 16 h 21 min #47184
Klaatu
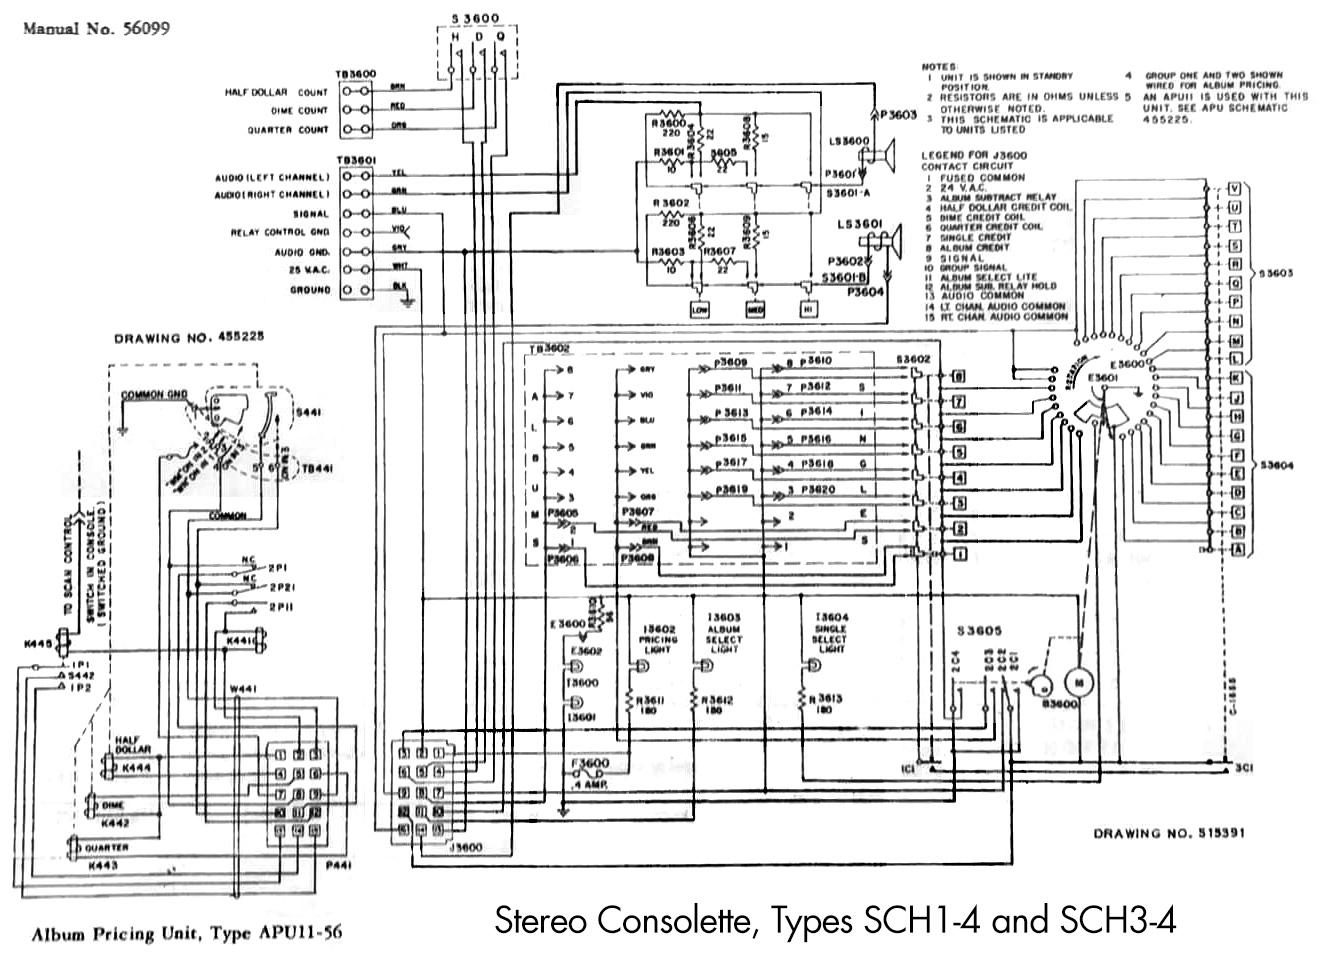
KeymasterFrom your file, made something printable, not great but at least readable on screen.
-
3 May 2020 at 22 h 12 min #47199
Scudie
ParticipantHi M_Shrenk
Thanks for the image of the wiring diagram it will be of a help to others.
I see Klaatu has worked some kind of magic on it and changed your photo into what looks like a PDF diagram.
Thanks Klaatu for also adding the image to the support section Manuals etc, for everyone to use.
Cheers Scudie
-
3 May 2020 at 22 h 24 min #47200
Klaatu
KeymasterHi Scudie,
Took more than a simple editing, but an interesting document worth to share !
Well spoted, I’ve added it to the Support files 😉
-
11 May 2020 at 13 h 30 min #47236
M_schrenk
ParticipantScudie,
I installed the 40ohm wire wound and all I get is a hum from the solenoids. I ordered 5W 20 ohm and 10 ohm wire wound but they are taking a long time for delivery. Would standard resistors like these work?

-
11 May 2020 at 21 h 28 min #47237
Scudie
ParticipantHi M _schrenk
Is the hum there as soon as the power is switched on ?
Are your coin switches open until activated by yourself or by a coin deposited.
Which solenoid is buzzing is it on the credit unit?
Cheers Scudie
-
12 May 2020 at 11 h 21 min #47238
Scudie
ParticipantHi I have been thinking about the coin switch problem on your SCH,
It’s been a while since I did any work on a SCH & the one I had did look different to yours as the coin switch assembly was a plastic affair, may be it was a later model or maybe it had been swapped at some point, it also had a foil type sticker serial number rather than a riveted plate.
As far as I can see the only solenoids in a SCH are on the Credit unit itself ?
As the speaker contol relay unit that is in a SC1-4 located behind the volume switches is not there in a SCH.
On the credit unit there are three coin switch related ones and two that a part of the audio circuit. The coin switch circuitry on the diagram is slightly different but I can’t see why it should not work the same as a SC.
I will try to take a look at one later.
Cheers Scudie
-
12 May 2020 at 13 h 07 min #47239
M_schrenk
ParticipantScudie – thanks for the help.
Is the hum there as soon as the power is switched on ? No, only when the coin switch is triggered. As the coin passes you hear the hum but a credit is not established.
Are your coin switches open until activated by yourself or by a coin deposited. Yes, they are normally open.
Which solenoid is buzzing is it on the credit unit? I deposited a quarter and it was the quarter solenoid.
I removed the resistor until the other smaller ohm ones arrive. I’m not triggering then much as I’m still working on other aspects. Without the resistor it does work just fine. I guess what I need to do is find the highest ohm that still allows the solenoids to operate.
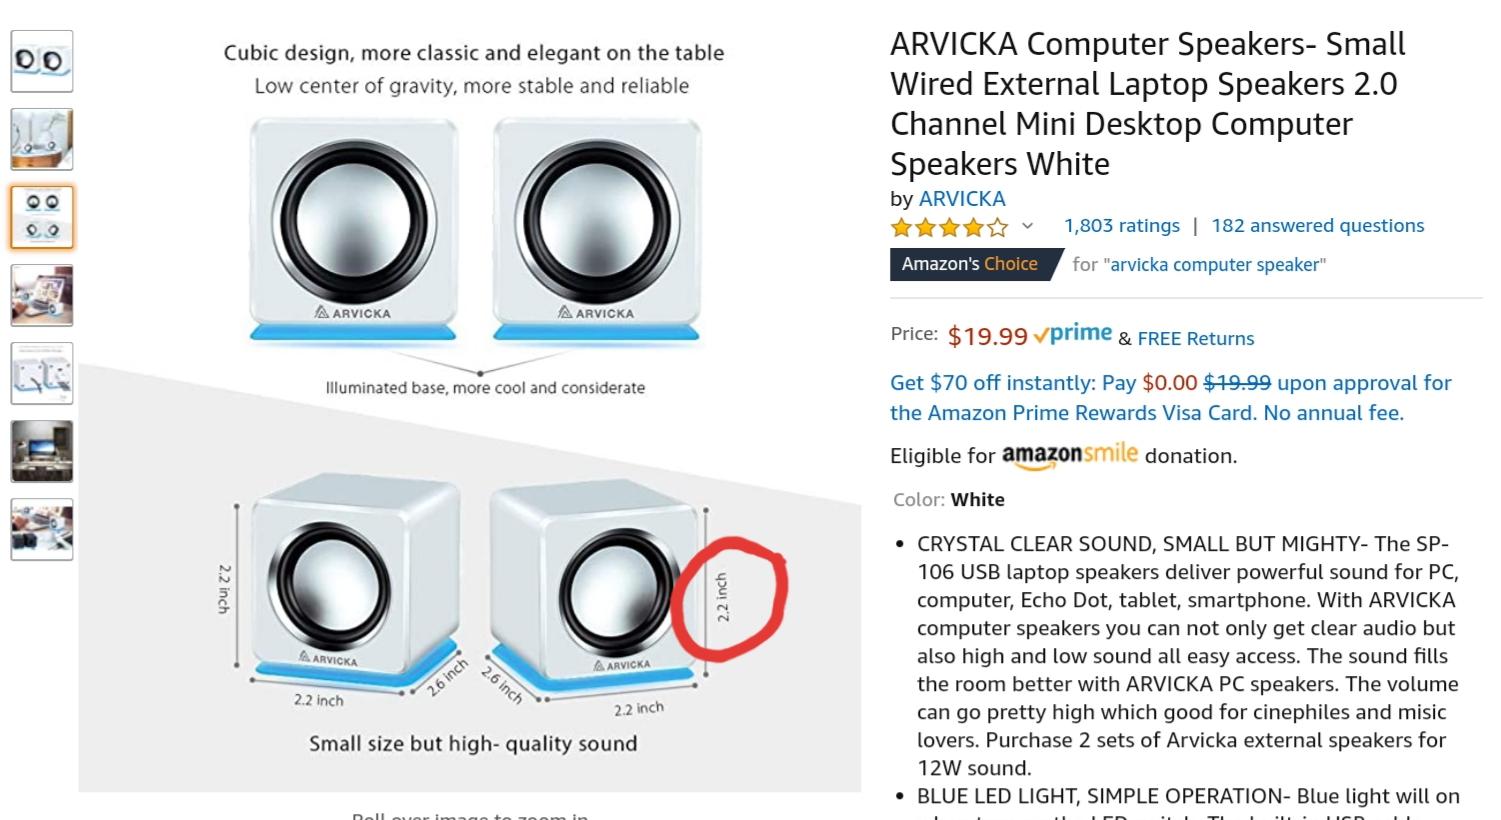
My machine is completely missing the volume mechanism and circuitry as well as the speakers. It appears to work fine without it (luckily) and I’m just going to use the speaker jack on the emulator to power a set of computer speakers. I spent some time last night making a fake spring system so the buttons move in and out but they do absolutely nothing for volume. I copied the system Seeburg used on the number/letter buttons and I fabricated it out of sheet metal and a few springs. Surprised myself that it actually works!
Today I should receive the enclosure, dedicated power supply for the emulator and a set of computer speakers I’m going to mount where the 3×5 speakers should be. The 3×5 speakers I had bought have a large magnet and will be very close if not touching the latch bar mechanism. Even if it did work I would have been modifying something to make them fit. I didn’t like that and they sounded like shit. The speaker set I bought are very small (2.2″ square enclosure) so I can screw them in to the original mounts without modifications to anything but the speaker housing. I can guarantee they will sound better especially because I’m keeping them in their tiny enclosure. They are powered by a 5V USB plug which I’ll cut and connect to the 5VDC on the emulator and then plug in to the 3.5mm audio port. It should work fine.
The enclosure is about 9×6 and I plan to mount it on the back. Kind of liking the fact that this one will be a self contained unit, unlike my 3WA that has a larger enclosure and drive in speakers…. Still cool as heck but much less portable.
-
12 May 2020 at 15 h 09 min #47240
Scudie
ParticipantHi Yes the coin switches should be open untill triggered, yes my coin switch’s are open until actuated.
I had noticed that the speaker was missing in your first photo, but had failed to notice that the volume control unit is also missing in the photo, I assume from your description of making a fake Spring system that you have part of the volume contol but it’s not complete?
I have had a look through some spares & located a APU 11-56 credit unit, it’s out of an SCH as it has a 15 pin plug, I don’t know it’s condition as I have never tested it but will take a look at it later & connect it up using the resistor I have.
Cheers Scudie
-
12 May 2020 at 19 h 03 min #47244
Scudie
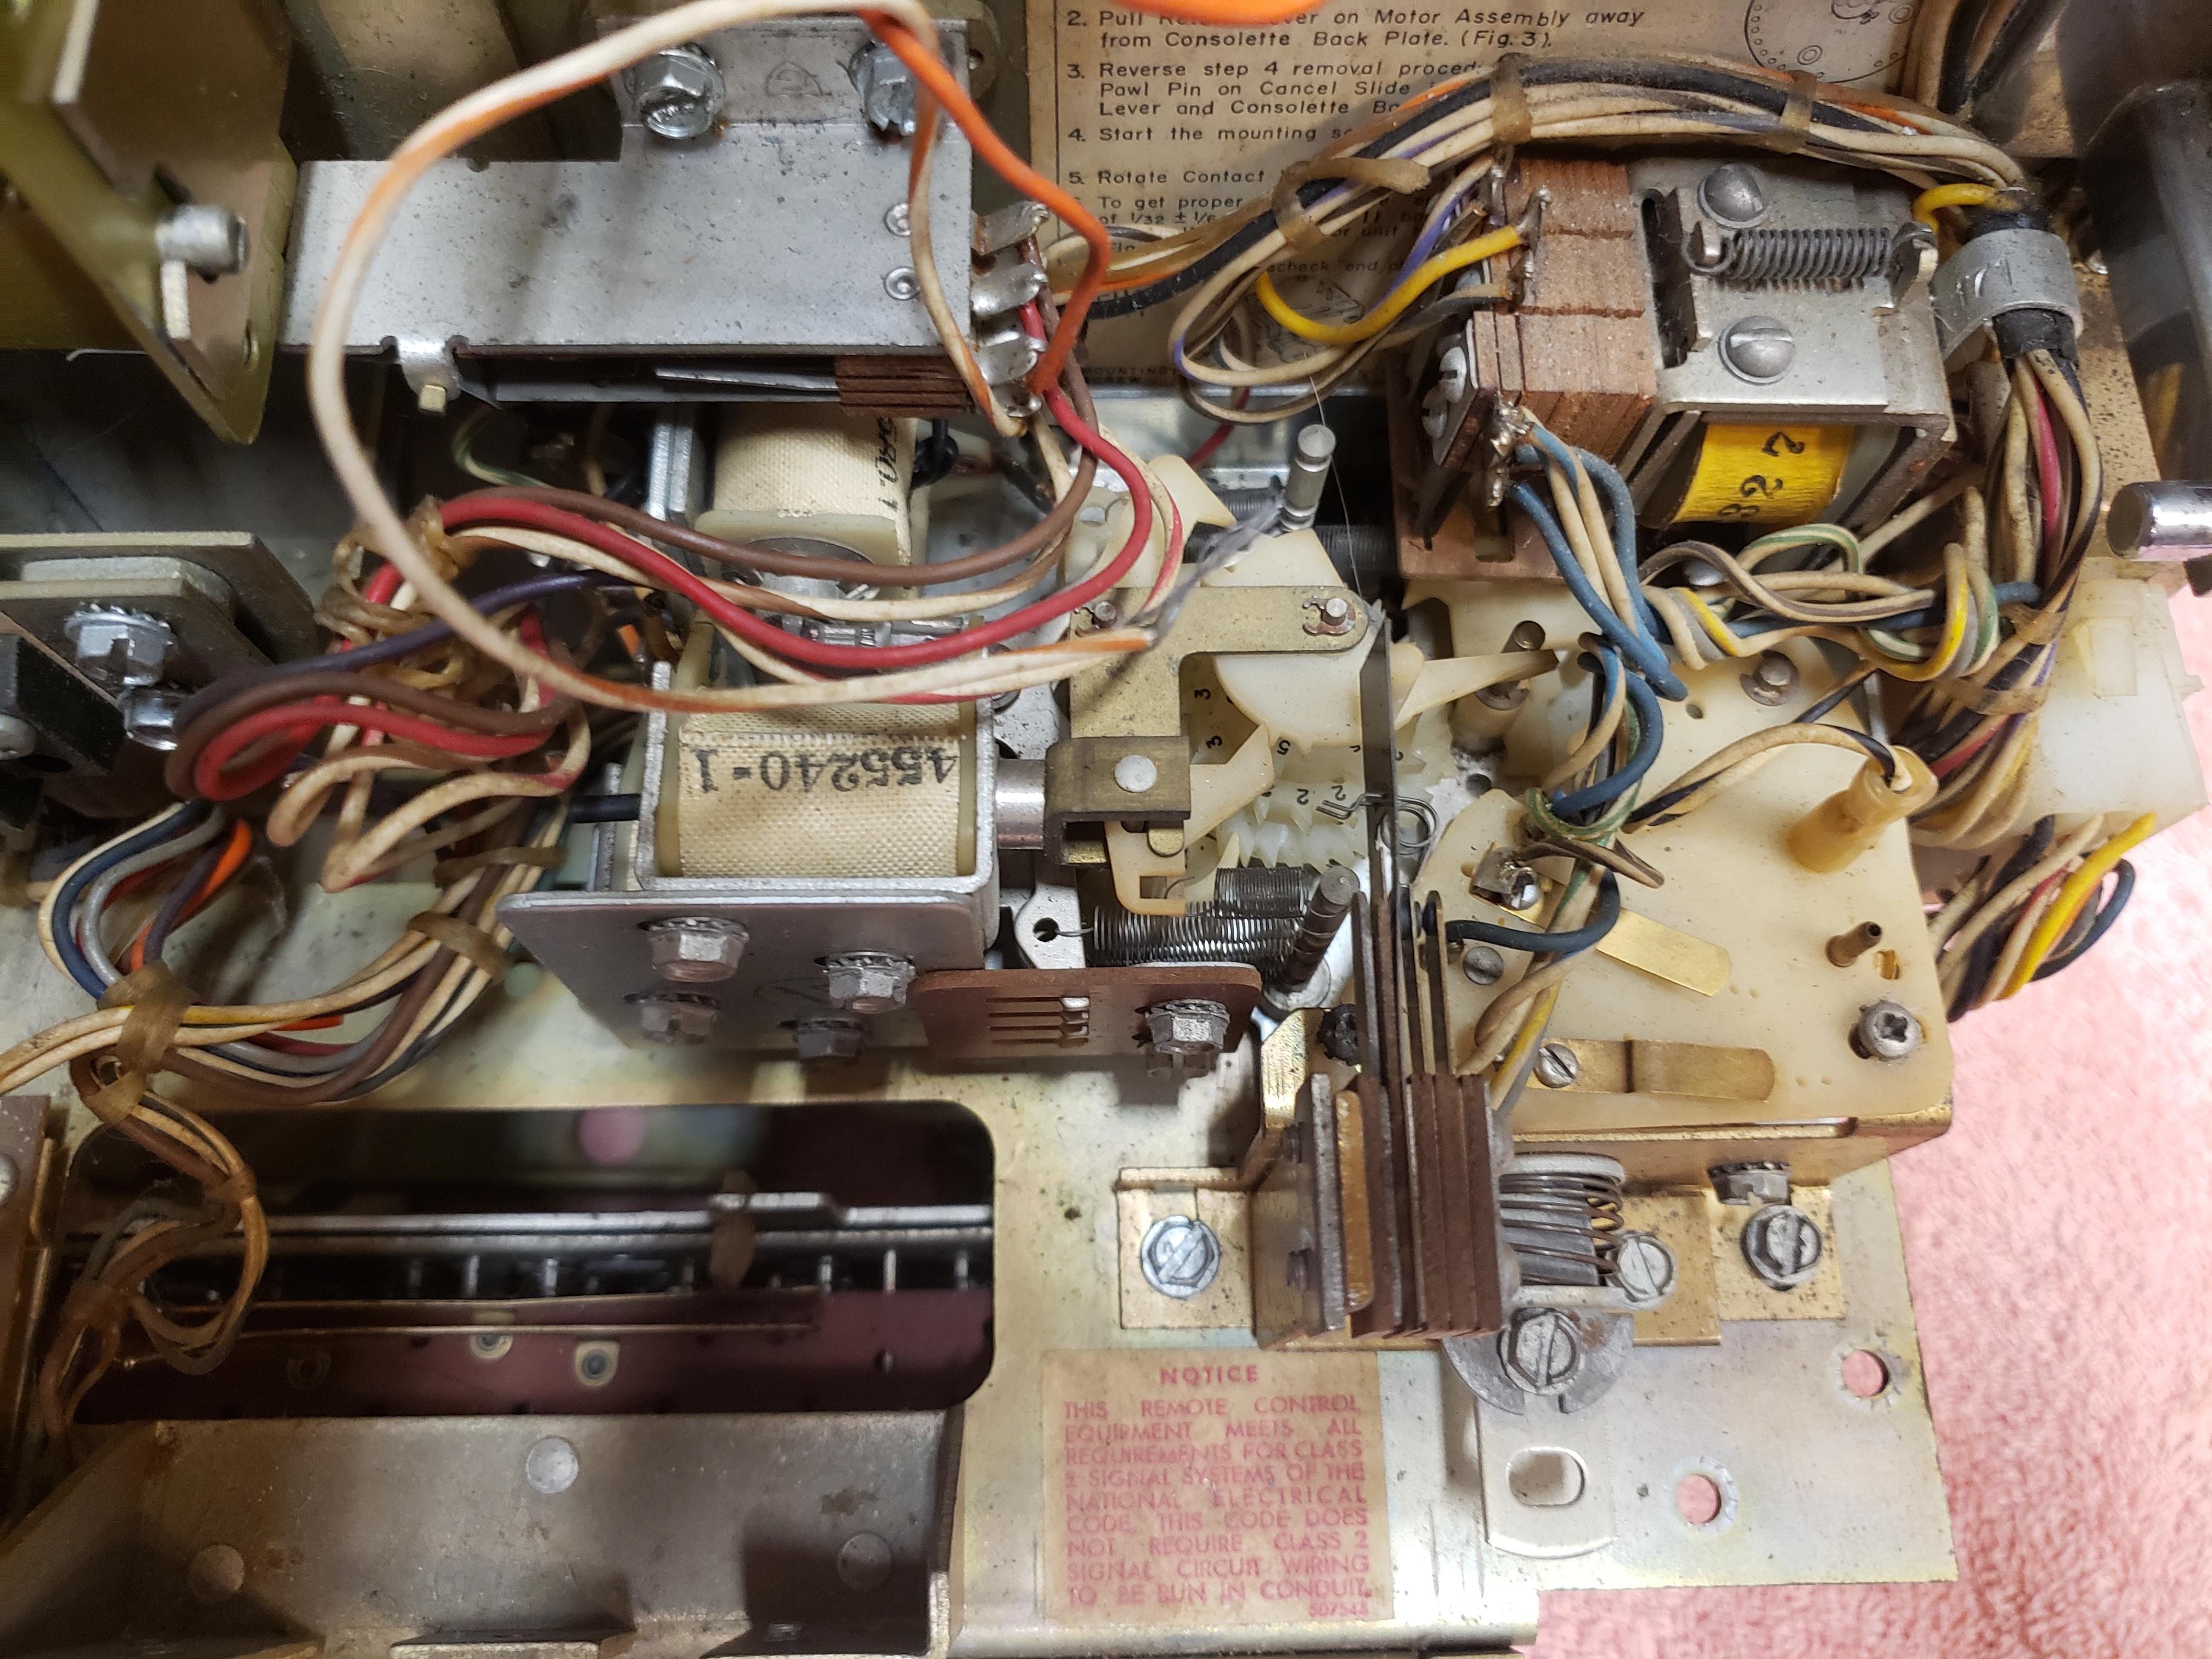
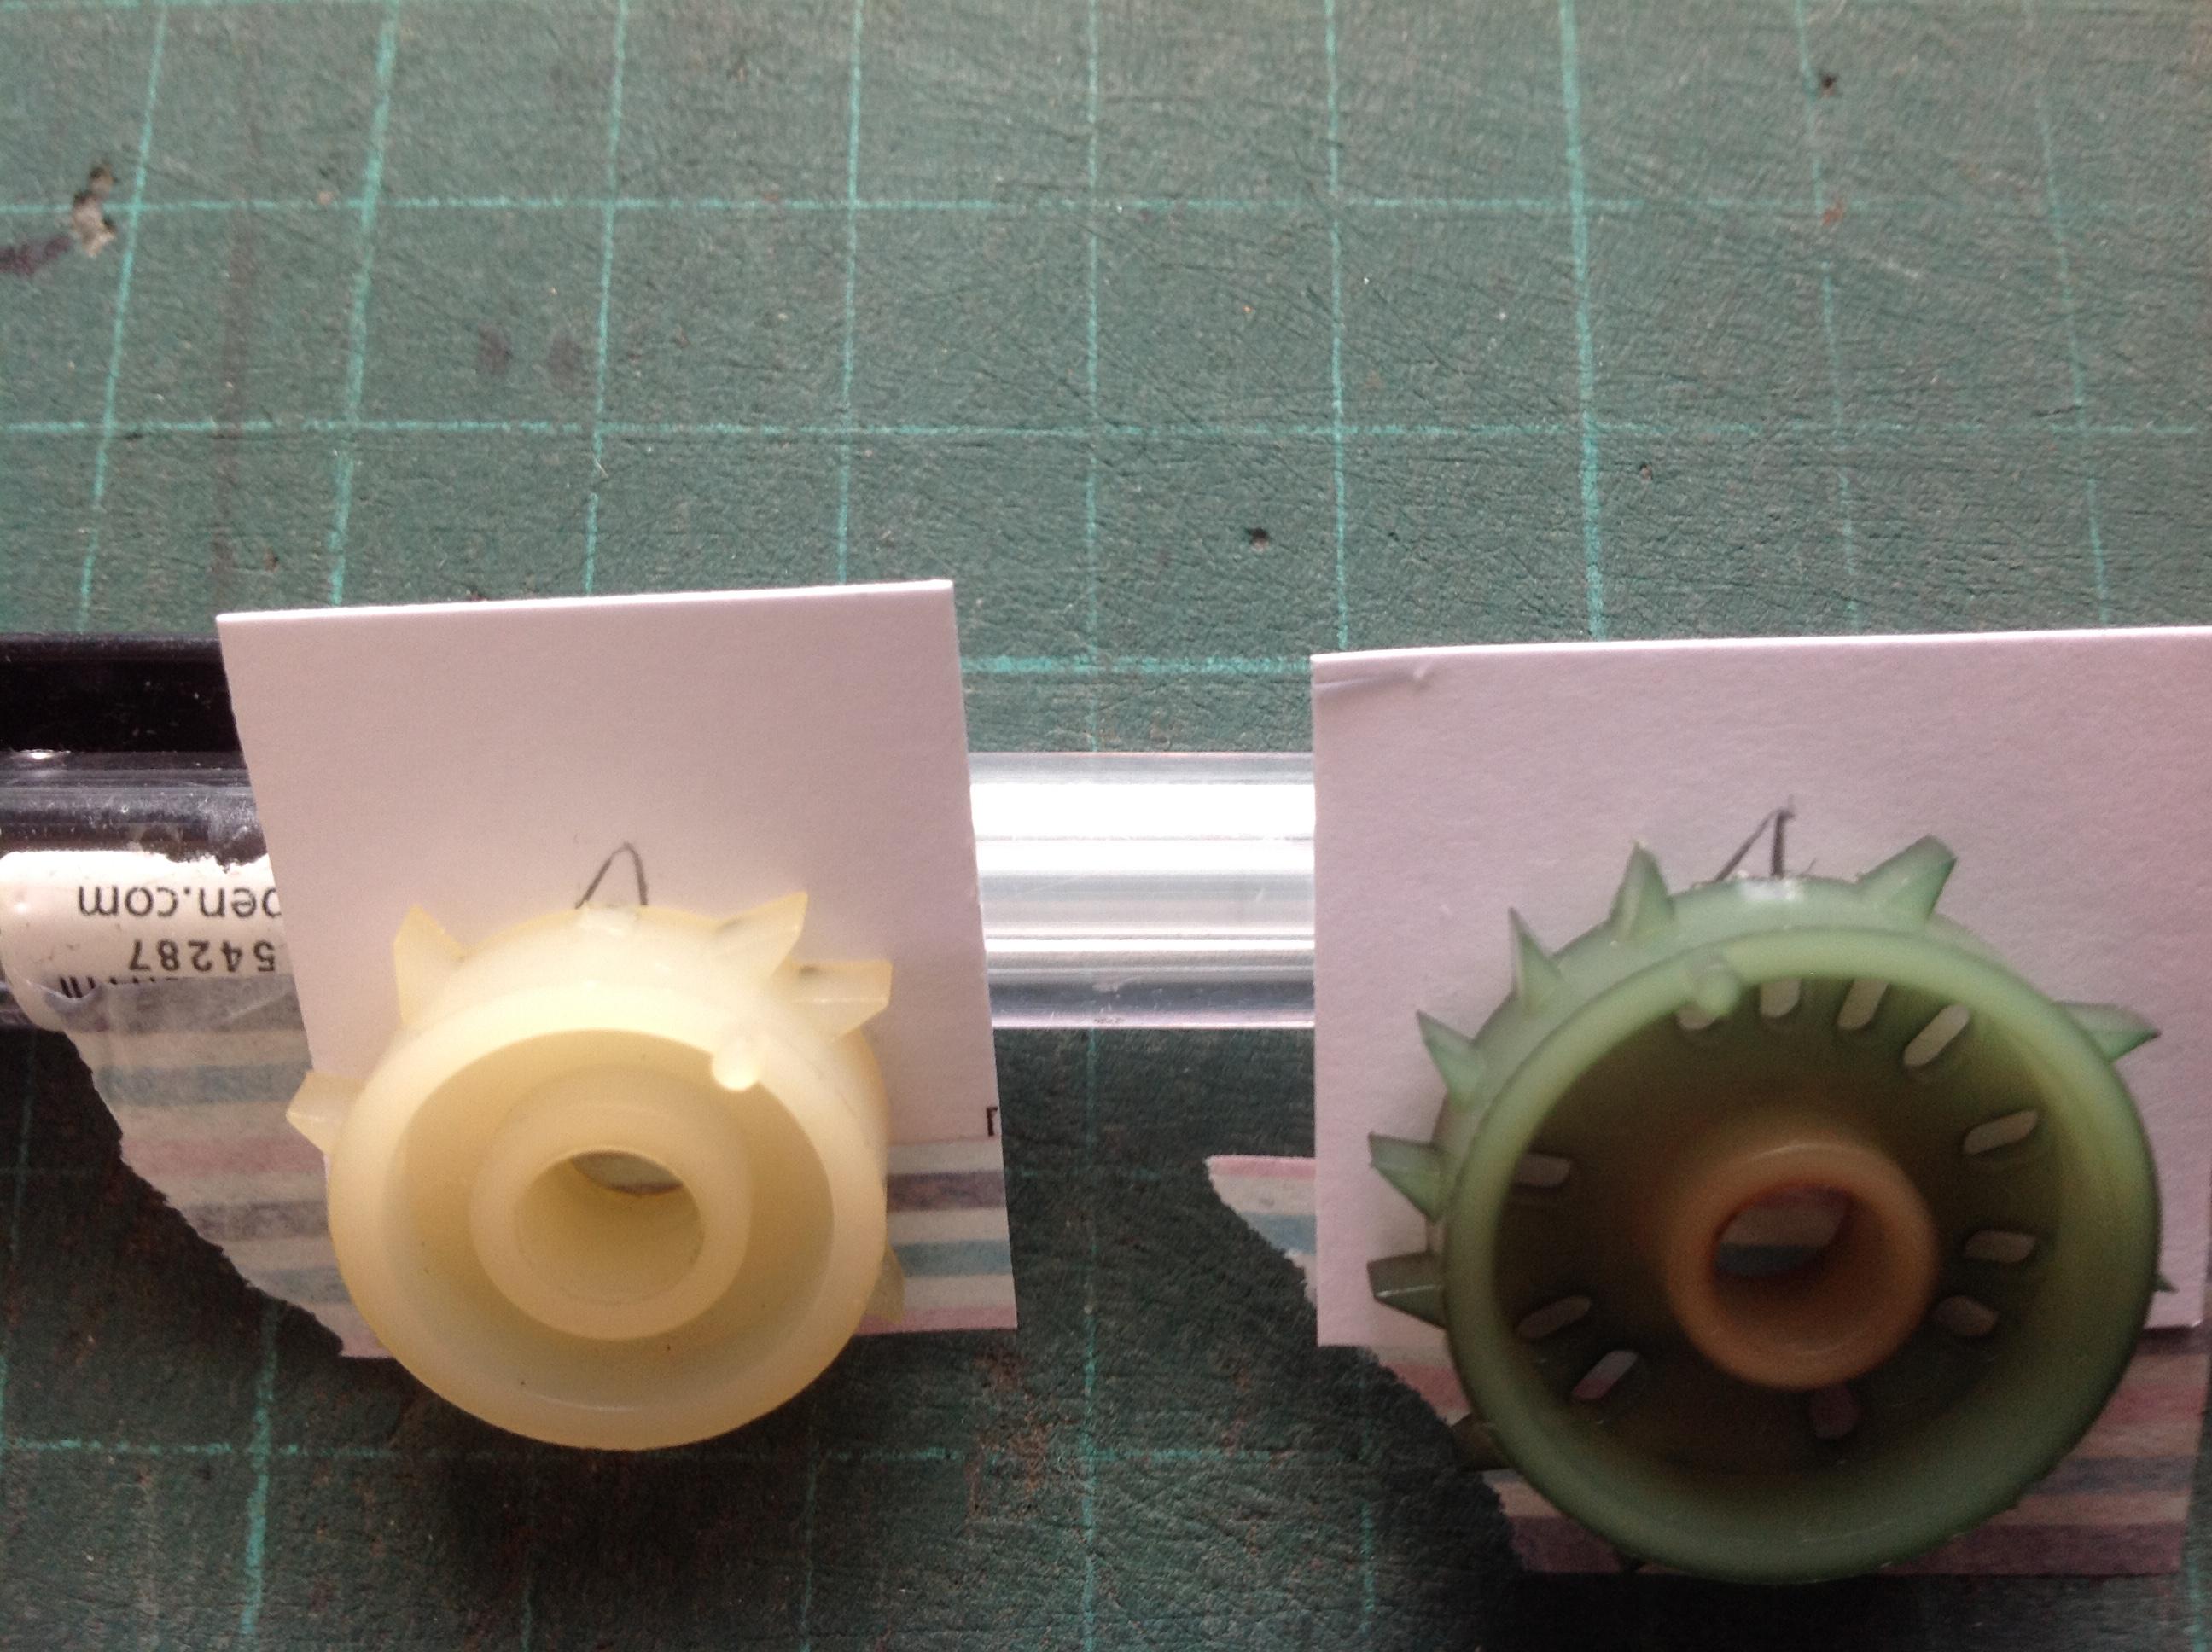
ParticipantHave just had a quick look at that credit unit and it appears to have a couple of missing teeth , one on the top small cream coloured wheel and one on the green coloured wheel directly below it, if you get the chance could you post a close up photo of the wheels of your credit unit please.
Cheers Scudie
-
12 May 2020 at 23 h 49 min #47245
M_schrenk
ParticipantNo problem!
Plan on working on the enclosure tonight – I’ll take some new ones and post them to the thread. Here’s what I already had taken for my “As Found” photos when I got it home.
Mike
-
12 May 2020 at 23 h 49 min #47246
M_schrenk
Participant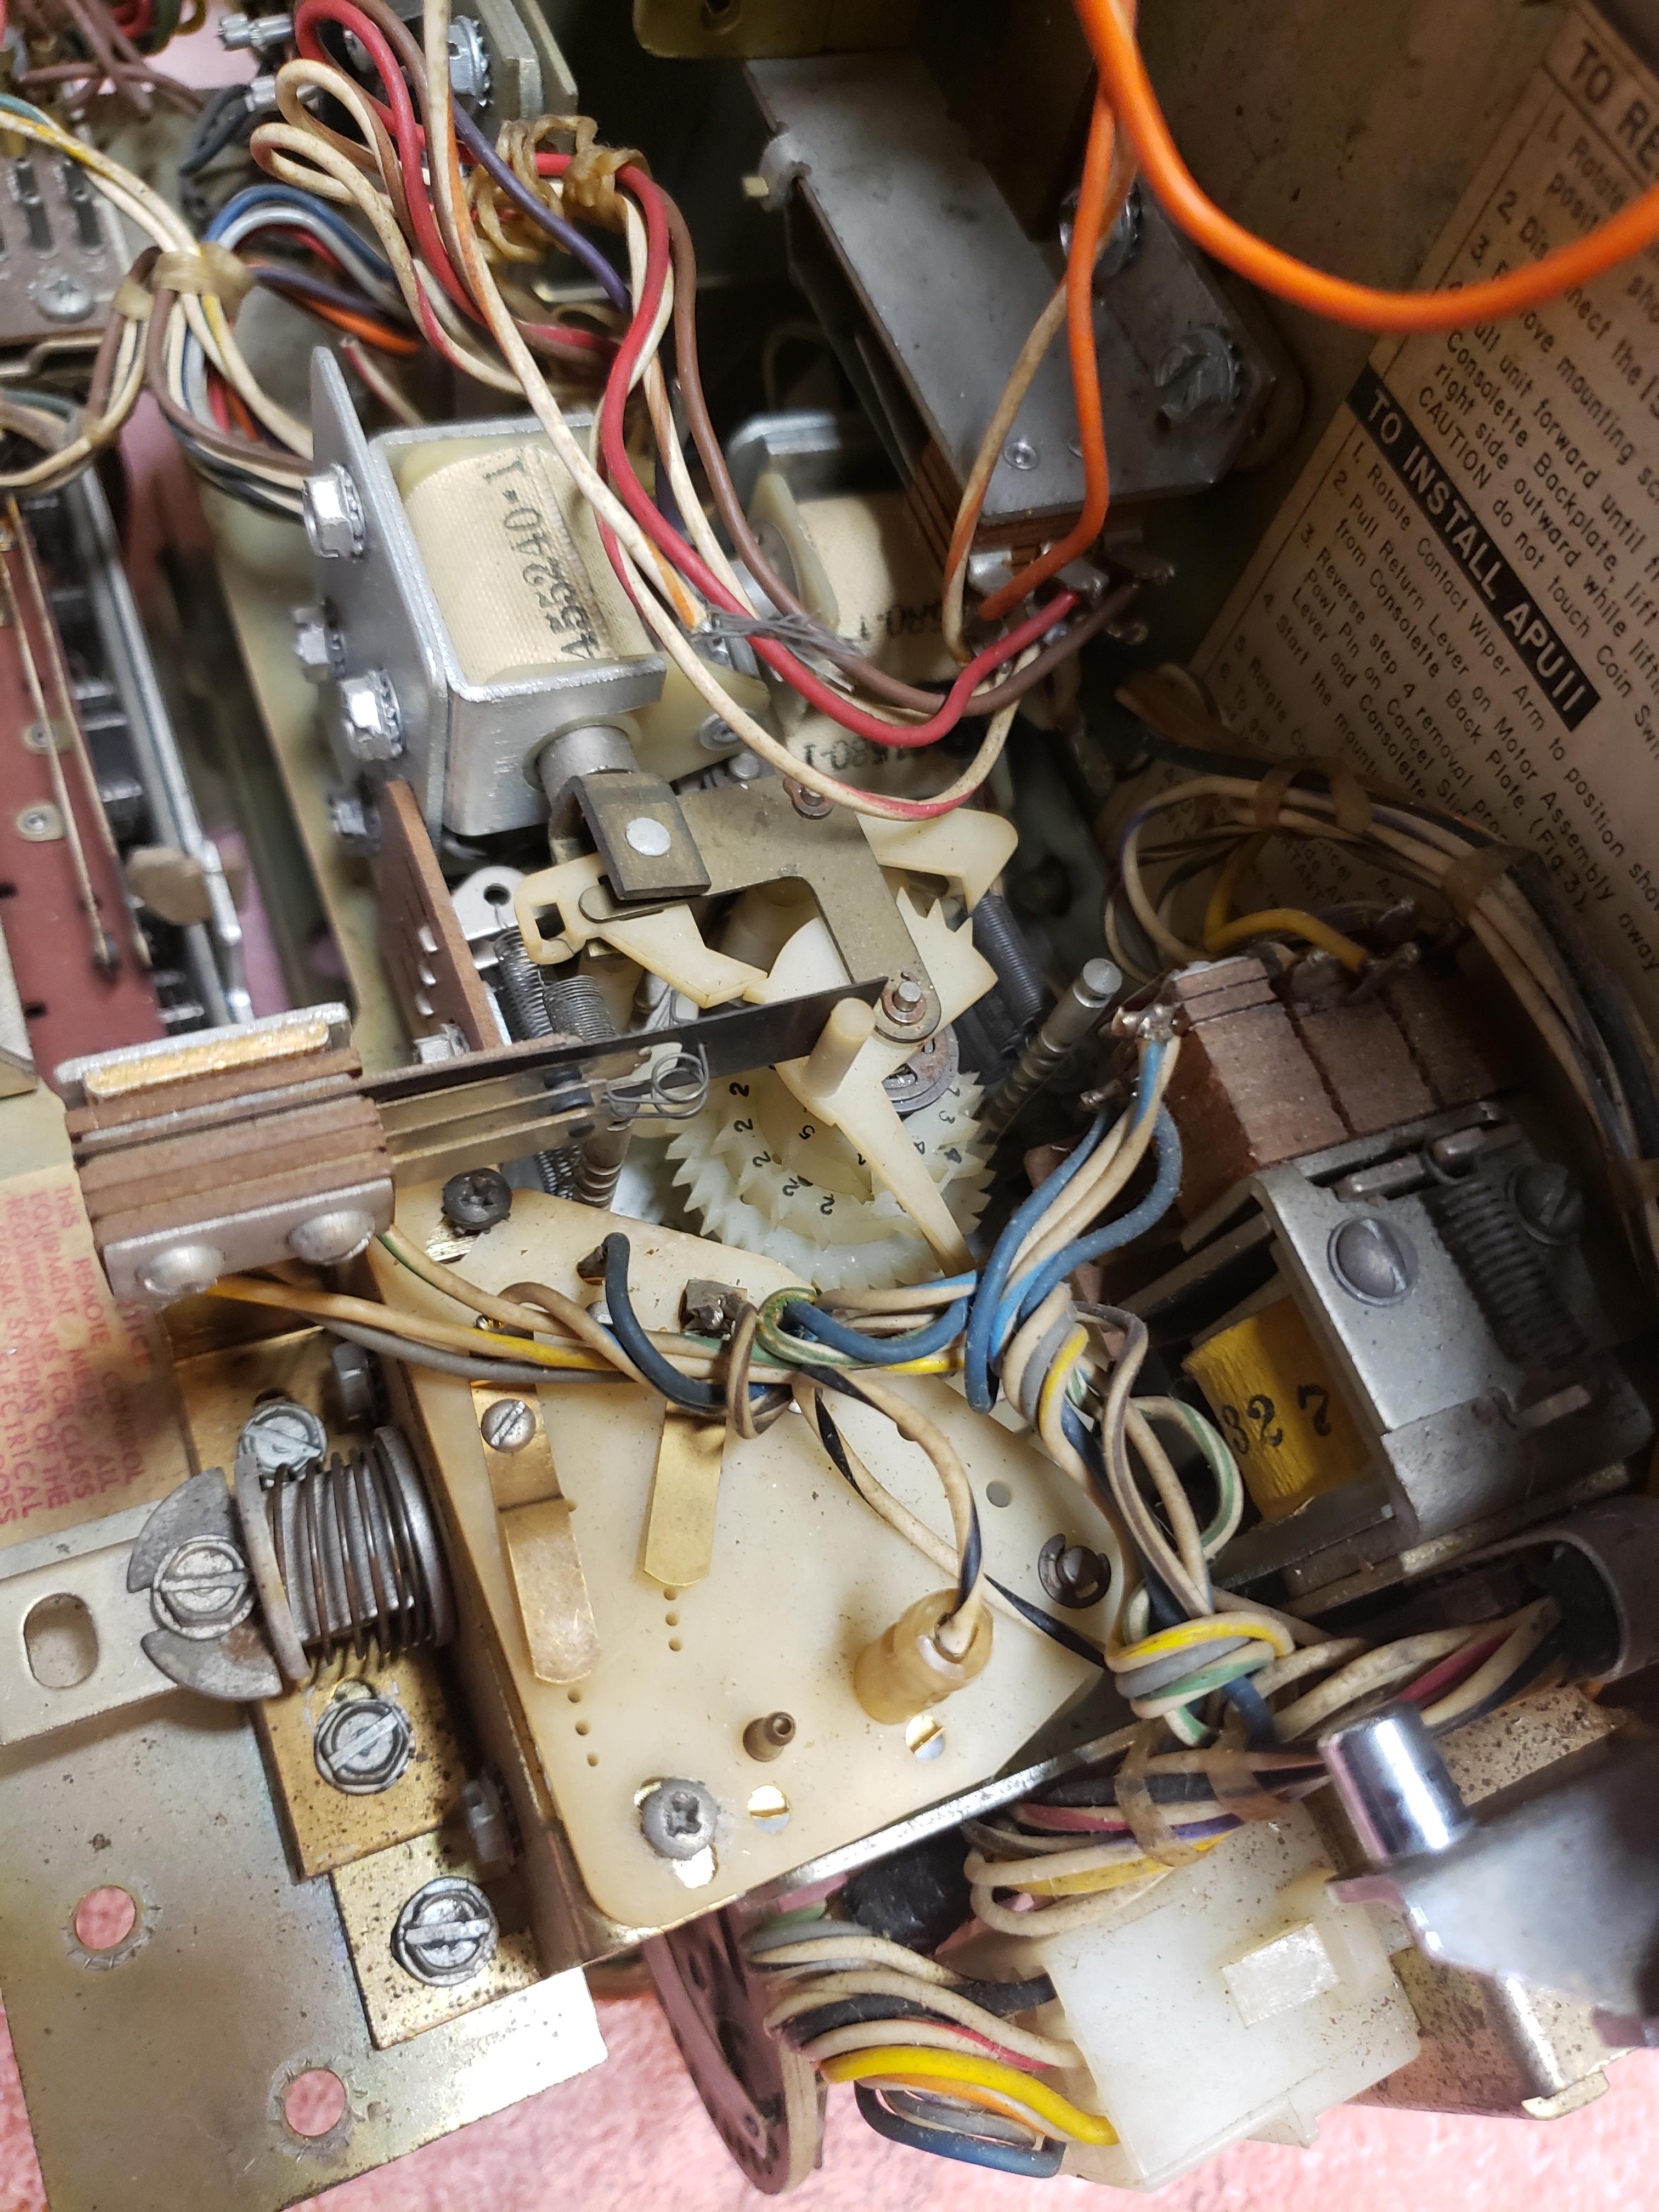
-
12 May 2020 at 23 h 49 min #47247
M_schrenk
Participant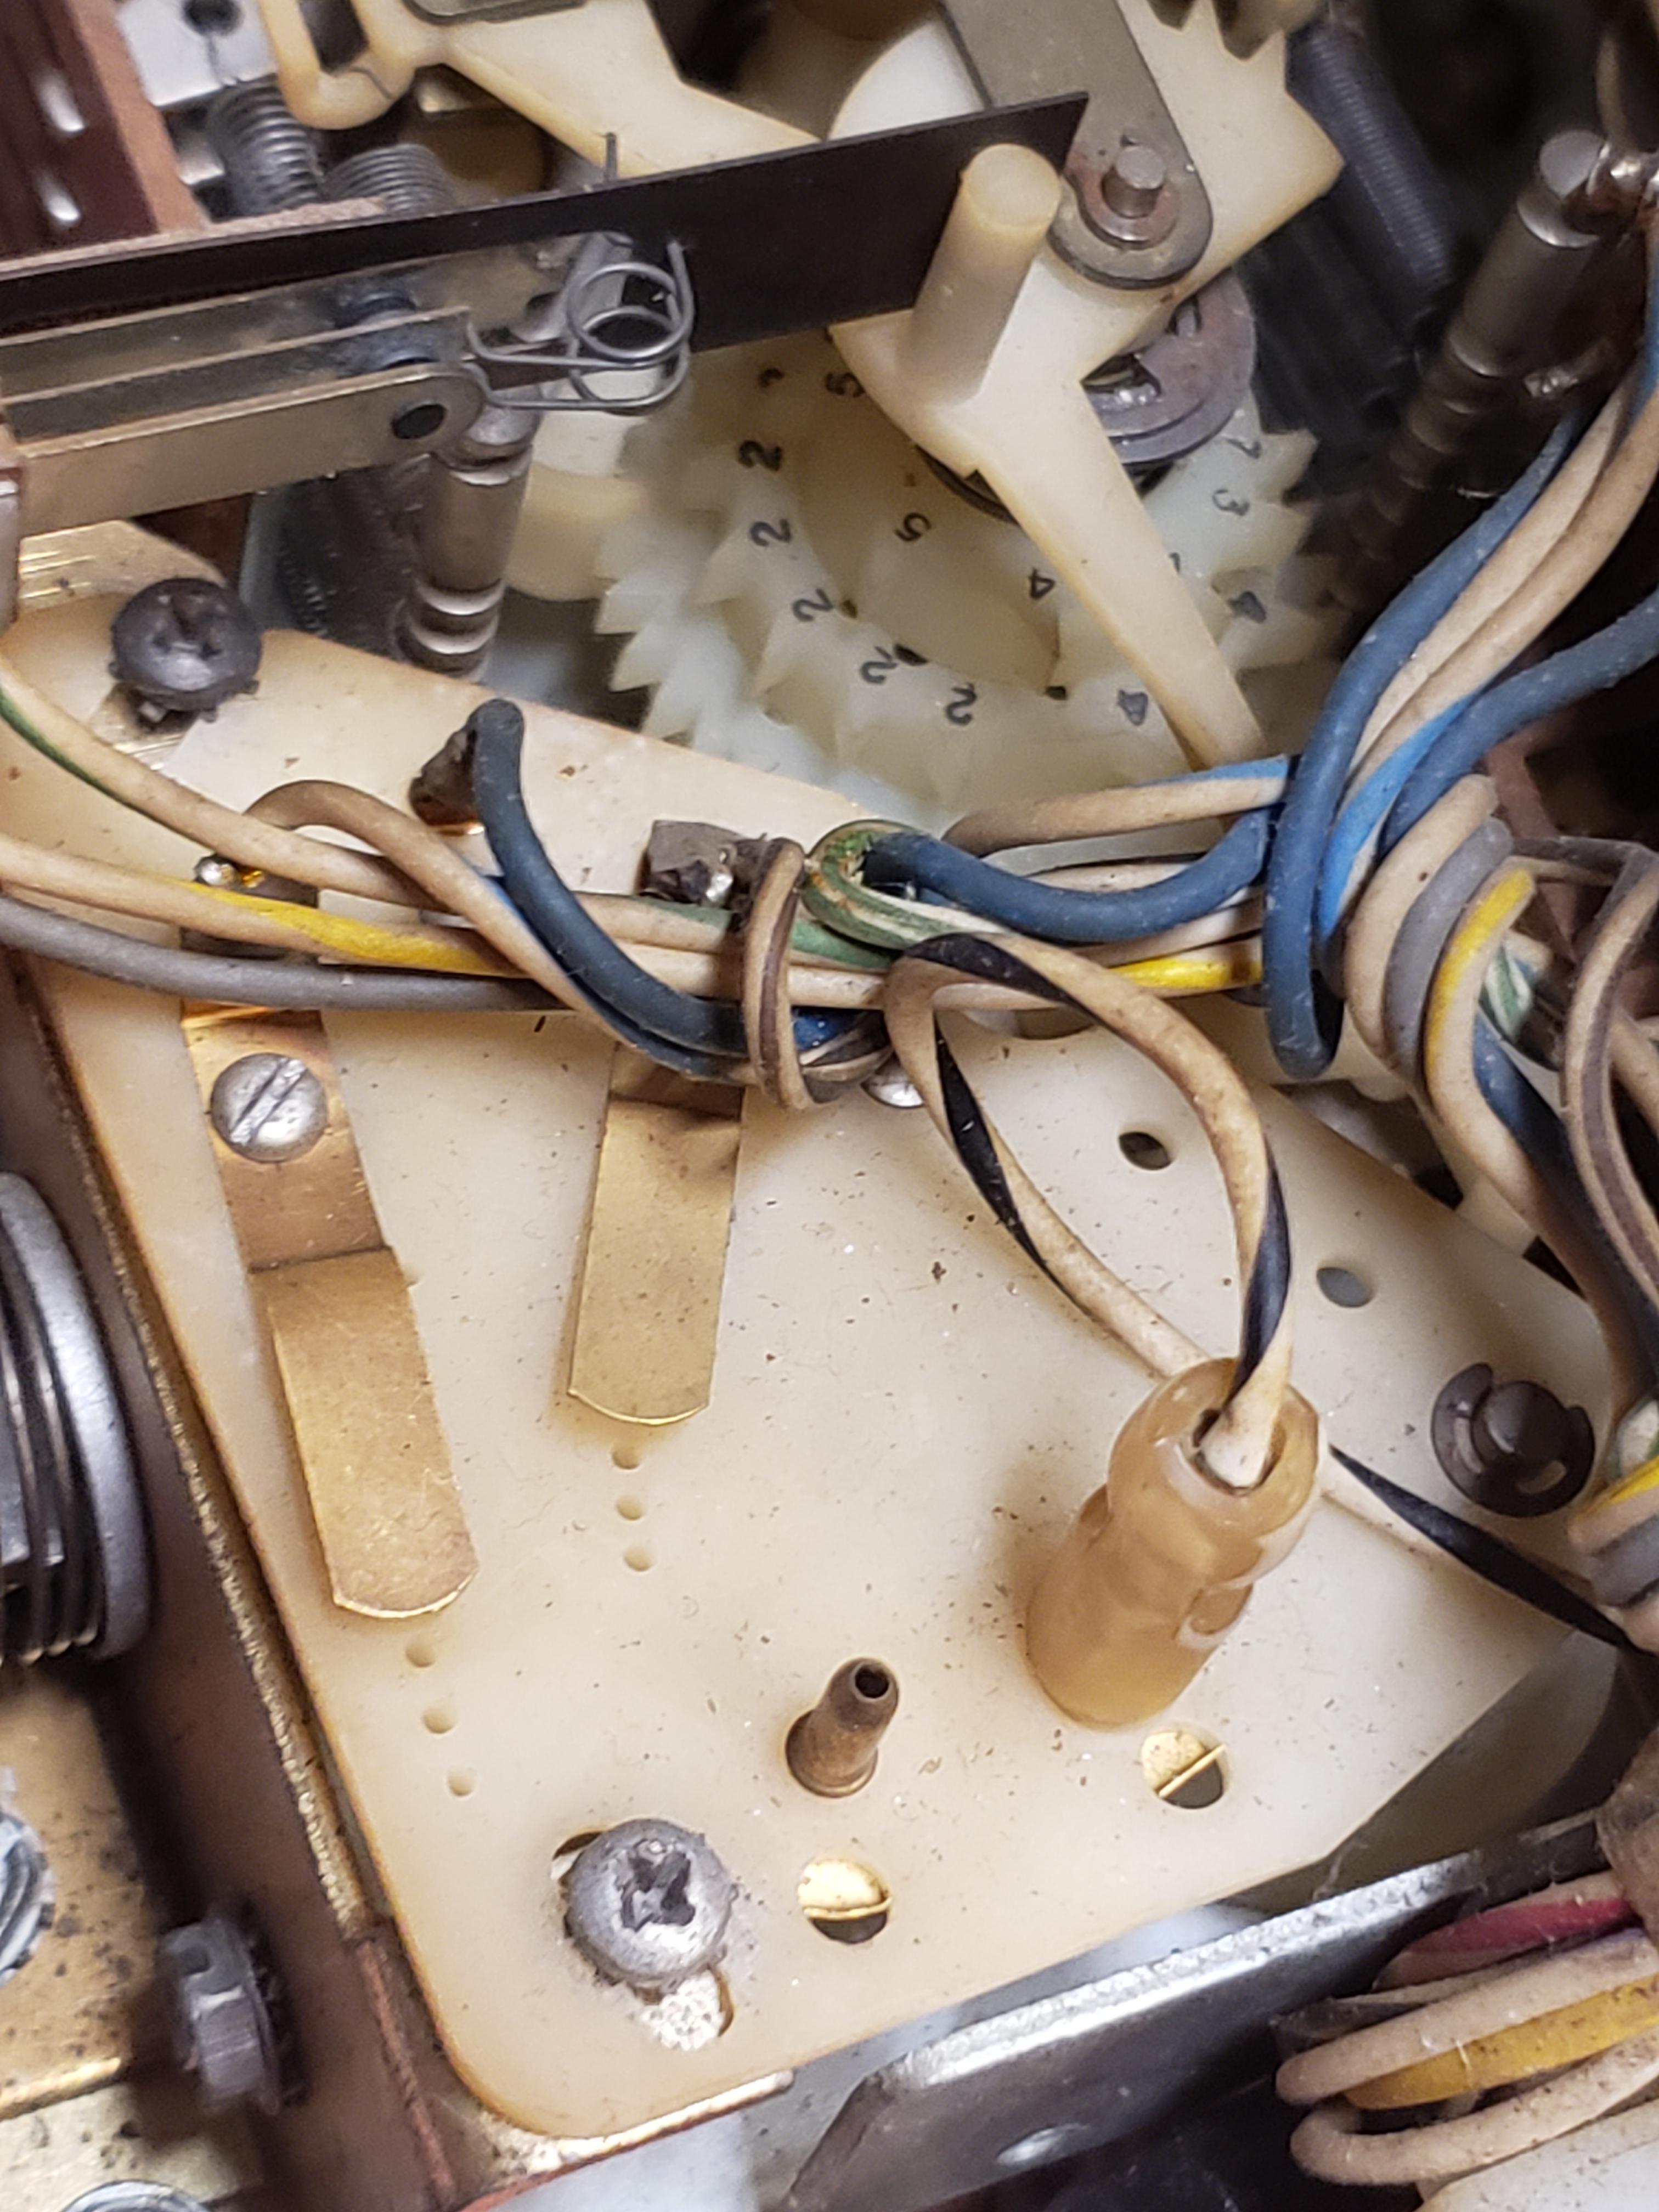
-
13 May 2020 at 1 h 29 min #47248
-
13 May 2020 at 22 h 02 min #47272
Scudie
ParticipantI took that the credit unit to pieces this afternoon, I was hoping that I could use a couple from an SC credit unit, although similar they are different. They may have fitted / worked in a fashion but as it is the only APU 11- 56 that I could find.
As the plastic credit wheels looked to be made of the same kind of plastic as the gears on the back of a SC /SCH title page unit, (I have in the past had to repair the page unit gear teeth when they have been sheared off) so thought I would have a go at the credit unit.
The photo clearly shows (or to be accurate) doesn’t show the missing teeth.
Cheers Scudie
-
14 May 2020 at 20 h 30 min #47273
Scudie
ParticipantHave repaired the two broken teeth & reasembled the credit unit, it’s not quite right the tooth on the top wheel requires a little more shaping. I also need to figure out how to set the wheels to achieve the required credits, have been using the instructions for a APU 10.
Any way I have connected the credit unit to a 25vac power through a 47ohm 10 watt resistor and can confirm that it does add credits when the half dollar solenoid is activated.
Cheers Scudie
-
15 May 2020 at 14 h 24 min #47274
M_schrenk
ParticipantWow – how did you recreate the missing teeth? I have not found a reliable method to fix anything plastic. Always seems to eventually fail.
The green gear may have been produced with what ever color polymer pellets the purchasing guy found at the best price. It is strange to see the greenish color…
-
20 June 2020 at 19 h 25 min #47505
Scudie
ParticipantHi M_Shrenk
Sorry for the late response have only just noticed I had not answered your question.
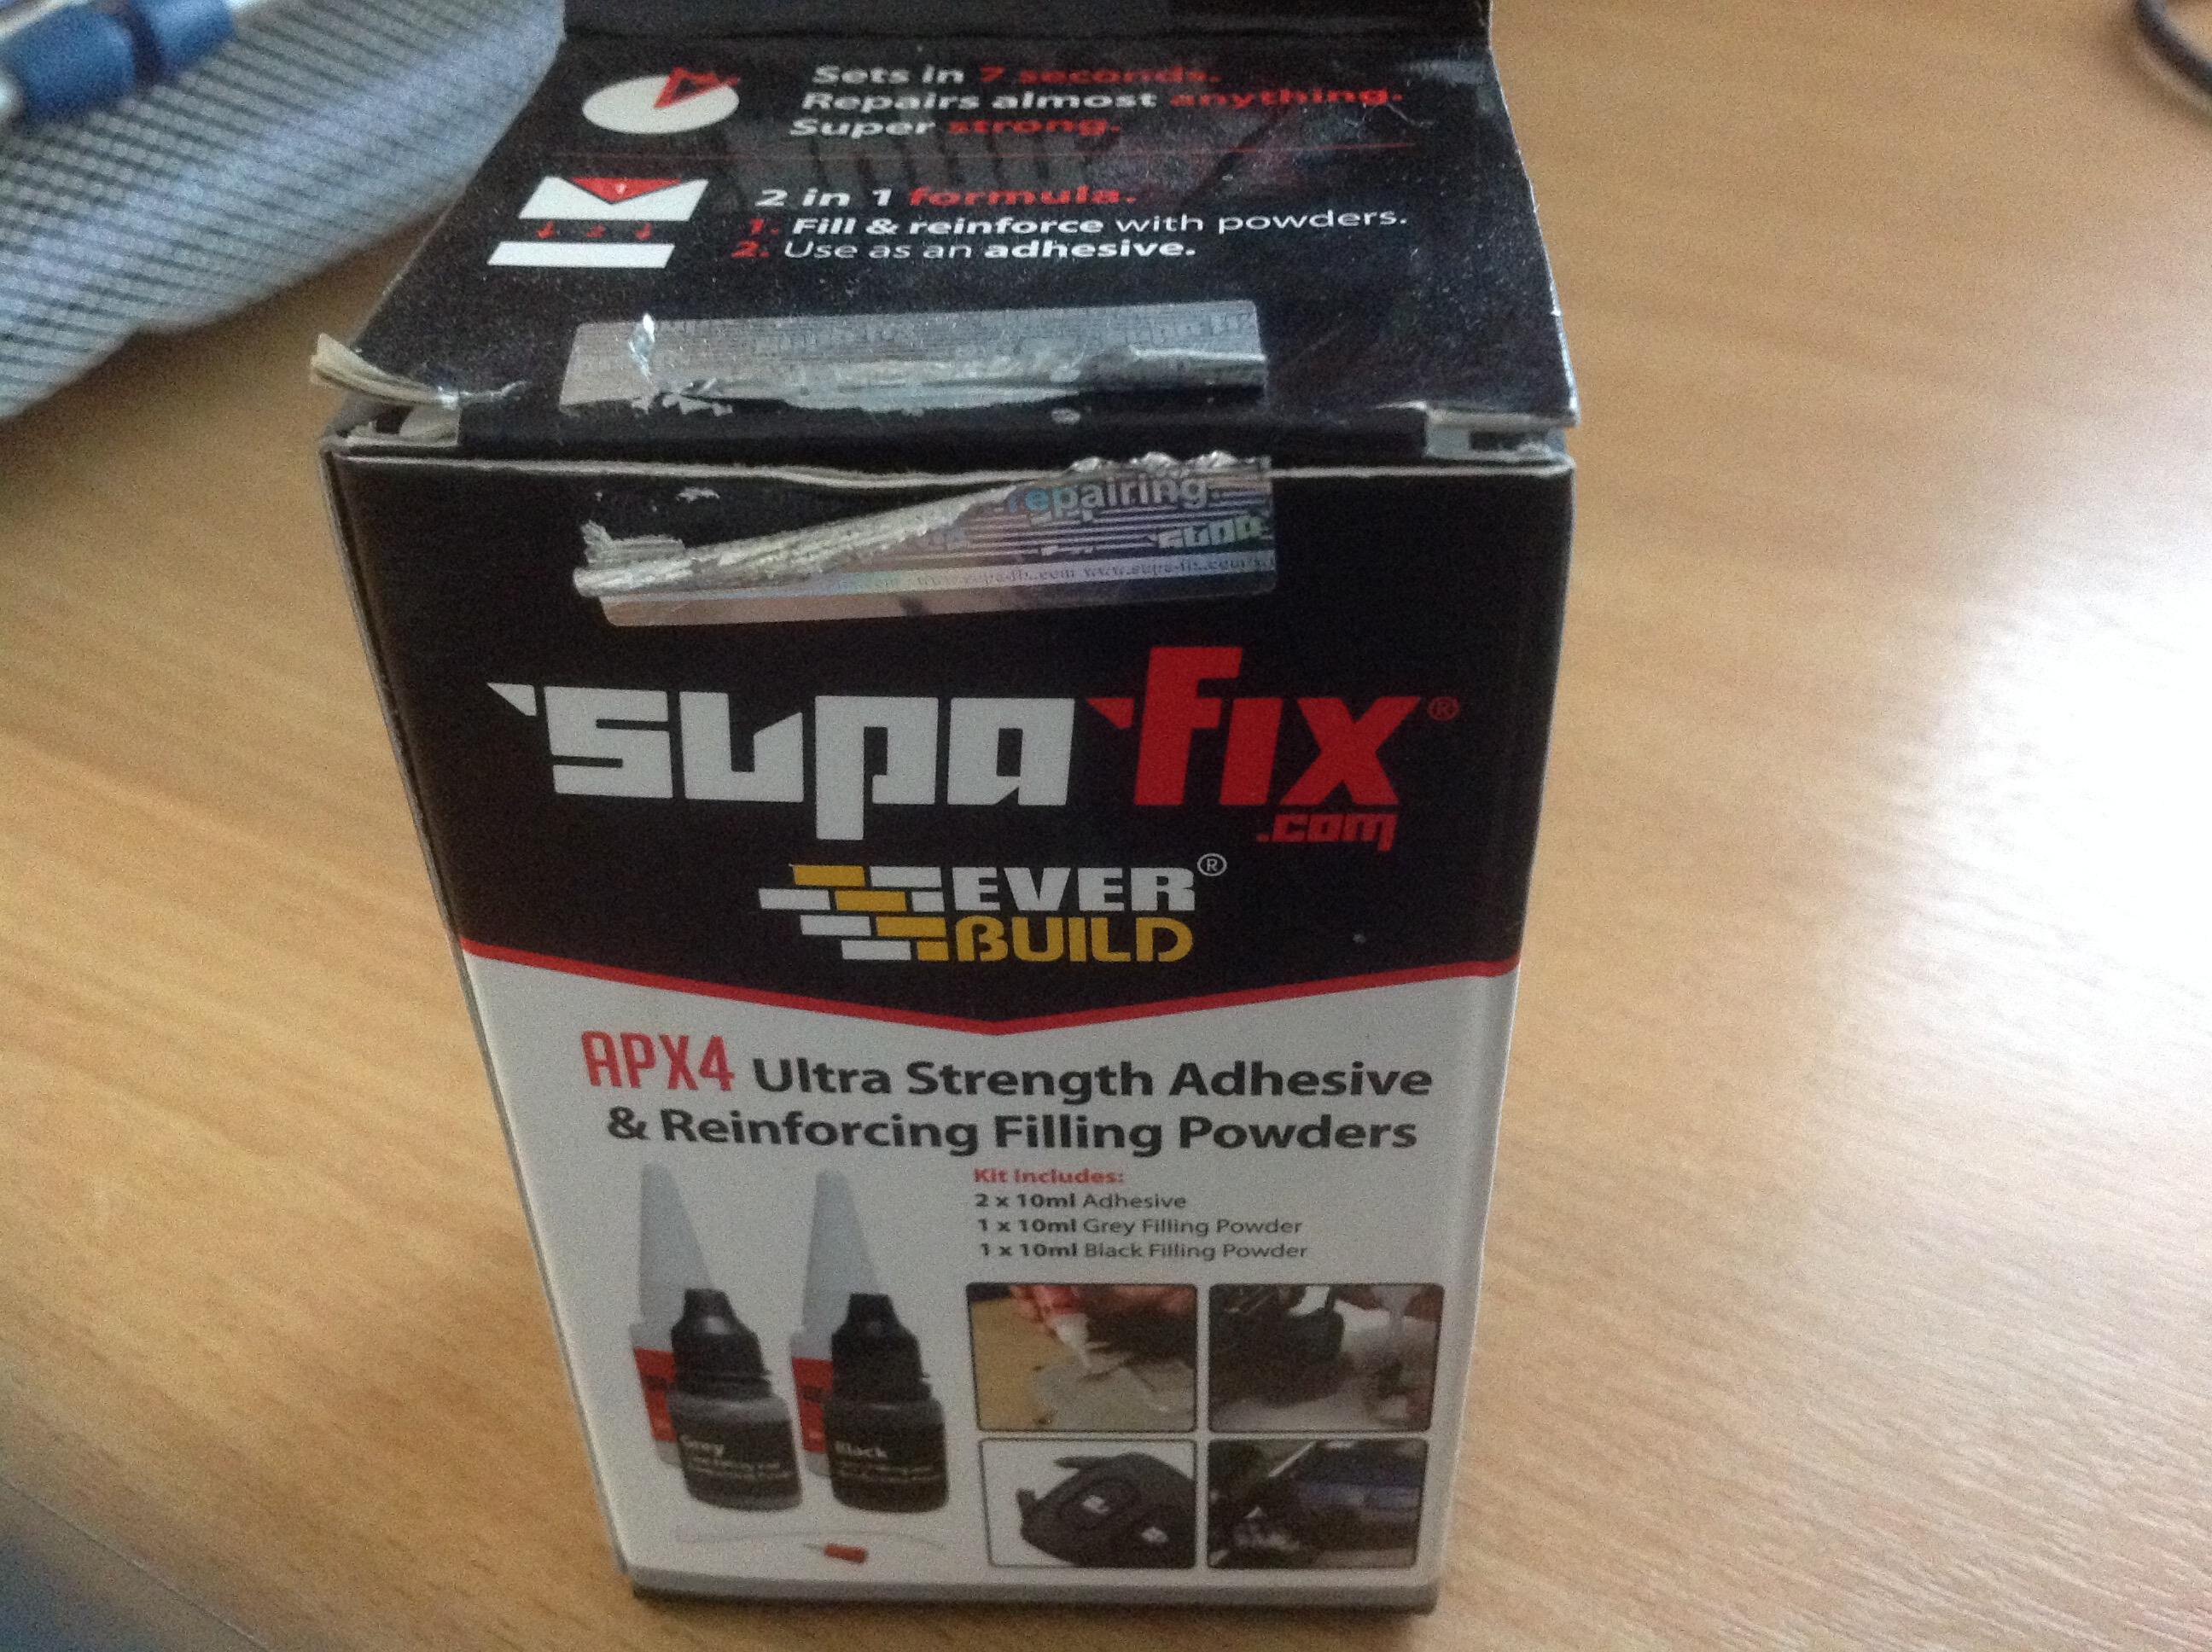
I used a product called Supa fix when I purchased it several years ago there was a bottle of Super glue type adhesive plus the two containers of powder, the original bottle of glue dried up so now I buy a card of cheap superglue tubes from a £ shop when I see it.
Bassically you apply the glue to where you want to build onto, then sprinkle the powder onto the wet glue, then more glue & then more powder and so on untill you have a built up lump that is sufficiently large enough to be able to then be shaped as required.
It worked extremely well on the title page gears so thought it worth a bash on the credit unit teeth.
Cheers Scudie
-
-
AuthorPosts
- You must be logged in to reply to this topic.
